Setting up a Wireguard VPN in UniFi
This is a quick post showing how to set up a Wireguard VPN in an UniFi Dream Machine.

This weekend’s side quest: installing Starlink as my second internet provider. Here’s how it went.
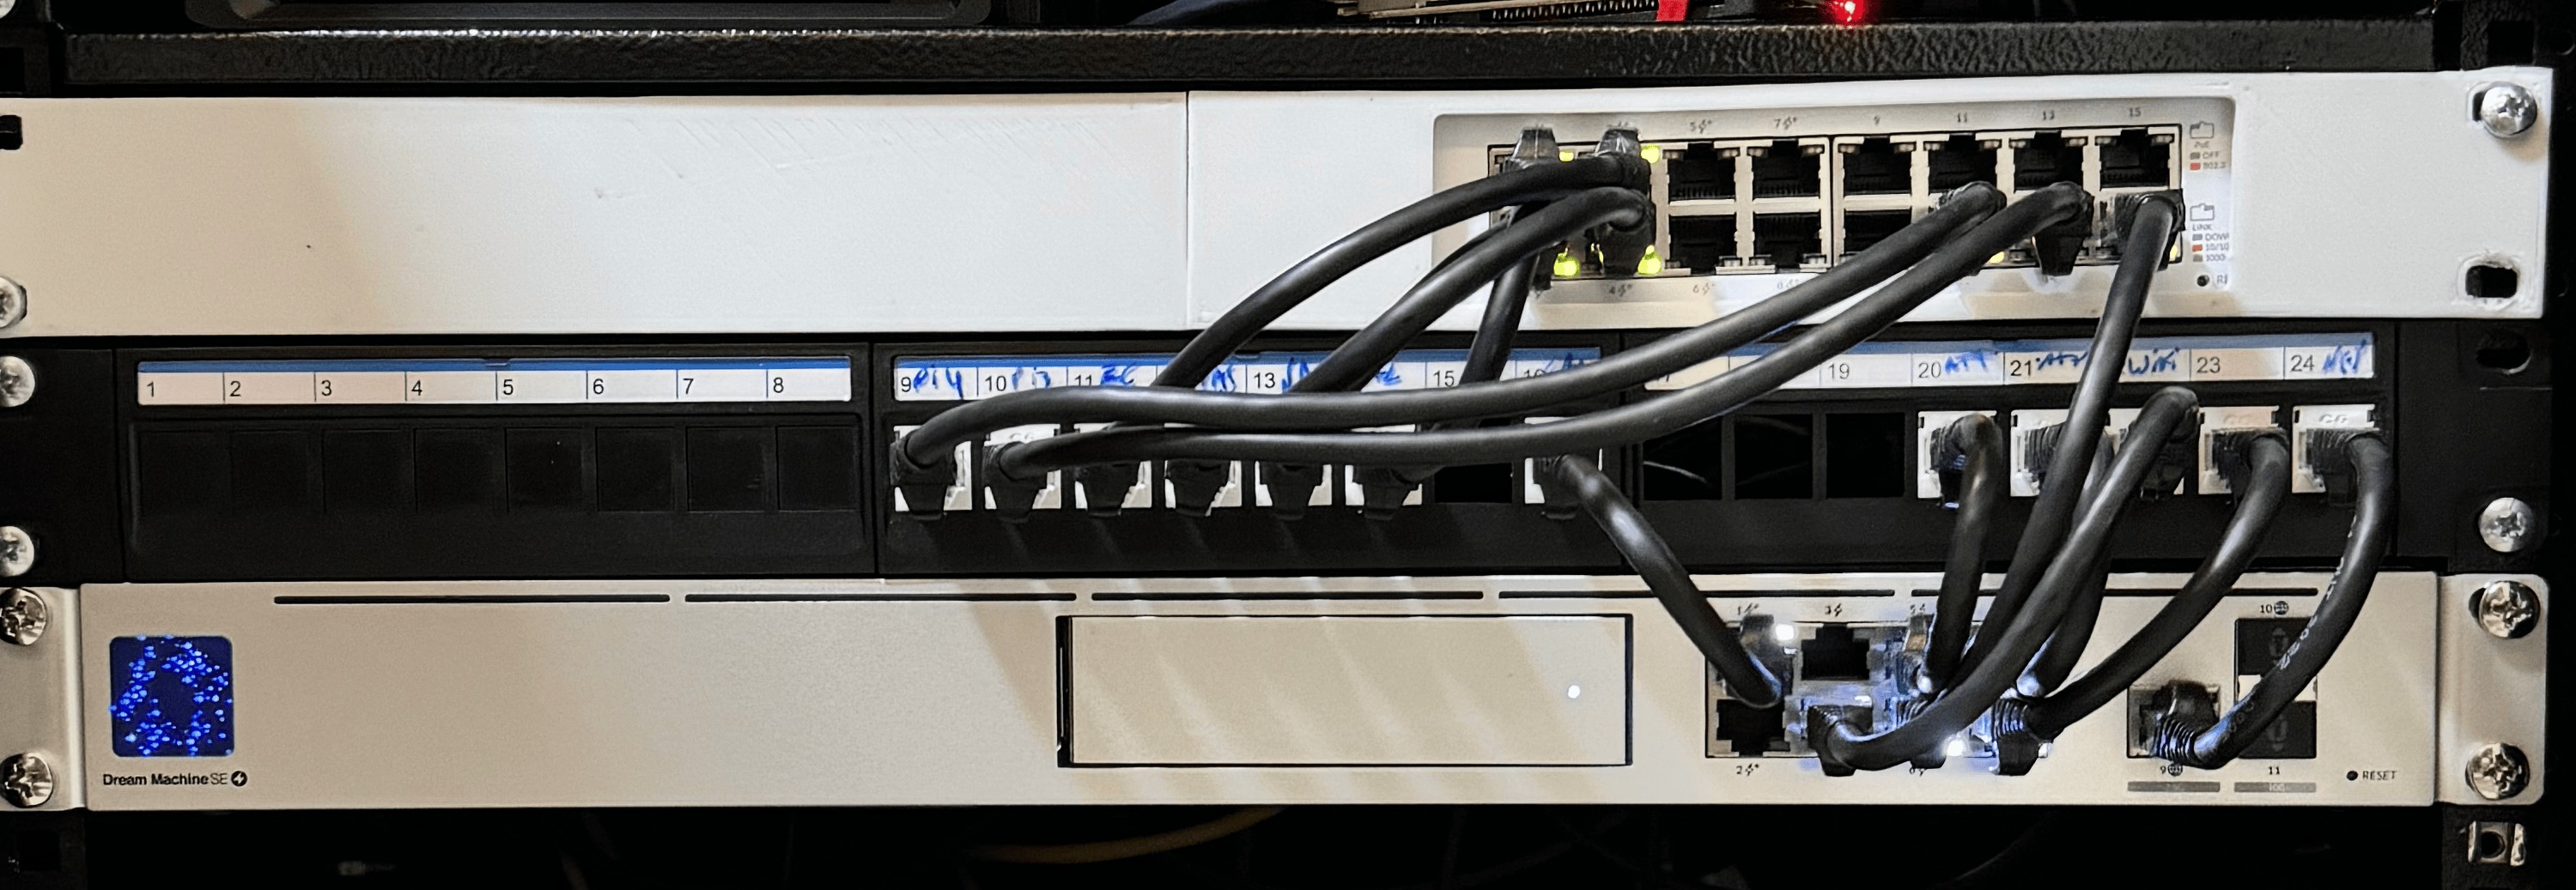
Part of my home lab's rack.
I live in a small-ish town in the south of Brazil. We don’t have many internet provider options here, and the ones that exist are not that good either.
For instance, to get a 1 Gbps connection, I had to get the link using my company documents instead of my personal ones. Not too bad, but an extra hassle for seemingly no good reason or benefit (besides the better speeds).
Still, they don’t allow me to connect the fiber directly into the SFP+1 port and I have to deal with their dirty-cheap ONU2, which annoys me mainly because they sold me the link as an “enterprise link”.
This link also isn’t very reliable. It fails pretty often, sometimes fully, other times it just gets incredibly slow.
With all that in mind, I decided to get a backup link.
My first though was to use 4G, but it already barely work when everything else is right… If any internet provider goes down, 4G stops working because it gets too crowded, I guess. Also, if the power goes down in some parts of the town, you guessed it: the cellular network goes down too! 3 All in all, not a good backup option.
My other thought was getting fiber from another provider… But then, one day, all the providers in town went down at the same time because someone fucked up something somewhere downtown. All of them. The other providers also have worse track record, so that doesn’t help either.
Then, a couple of months ago, Starlink was half the price in Brazil. So I ordered it. And this week, it arrived!
I’ll start with things I didn’t like.
The cable is very tick, and the connector is pretty big as well.
I know in the US the walls are usually dry wall and you have plenty of space to run the wires, but here the situation is different.
Walls are commonly brick walls (yes, even the internal ones), and, if you’re lucky, you might have a conduit that fits maybe three ethernet cables and a fiber, but more commonly not even that.
In my case, it is impossible to run the Starlink cable down to my office.
Not gonna lie, this is one of the ugliest routers I have ever seen.

Soooo ugly...
I know, matter of opinion, and my opinion is that it is ugly.
Maybe Elon is not rich enough to send 4 screws with the kit? I don’t know - what I do know, is that I had to find screws before installing the antenna and I got a bit mad about it.
I remember reading the word “actuator” somewhere when ordering, but didn’t give it much attention for some reason.
It was a pleasant surprise when I saw it automatically pointing itself to the best satellites.
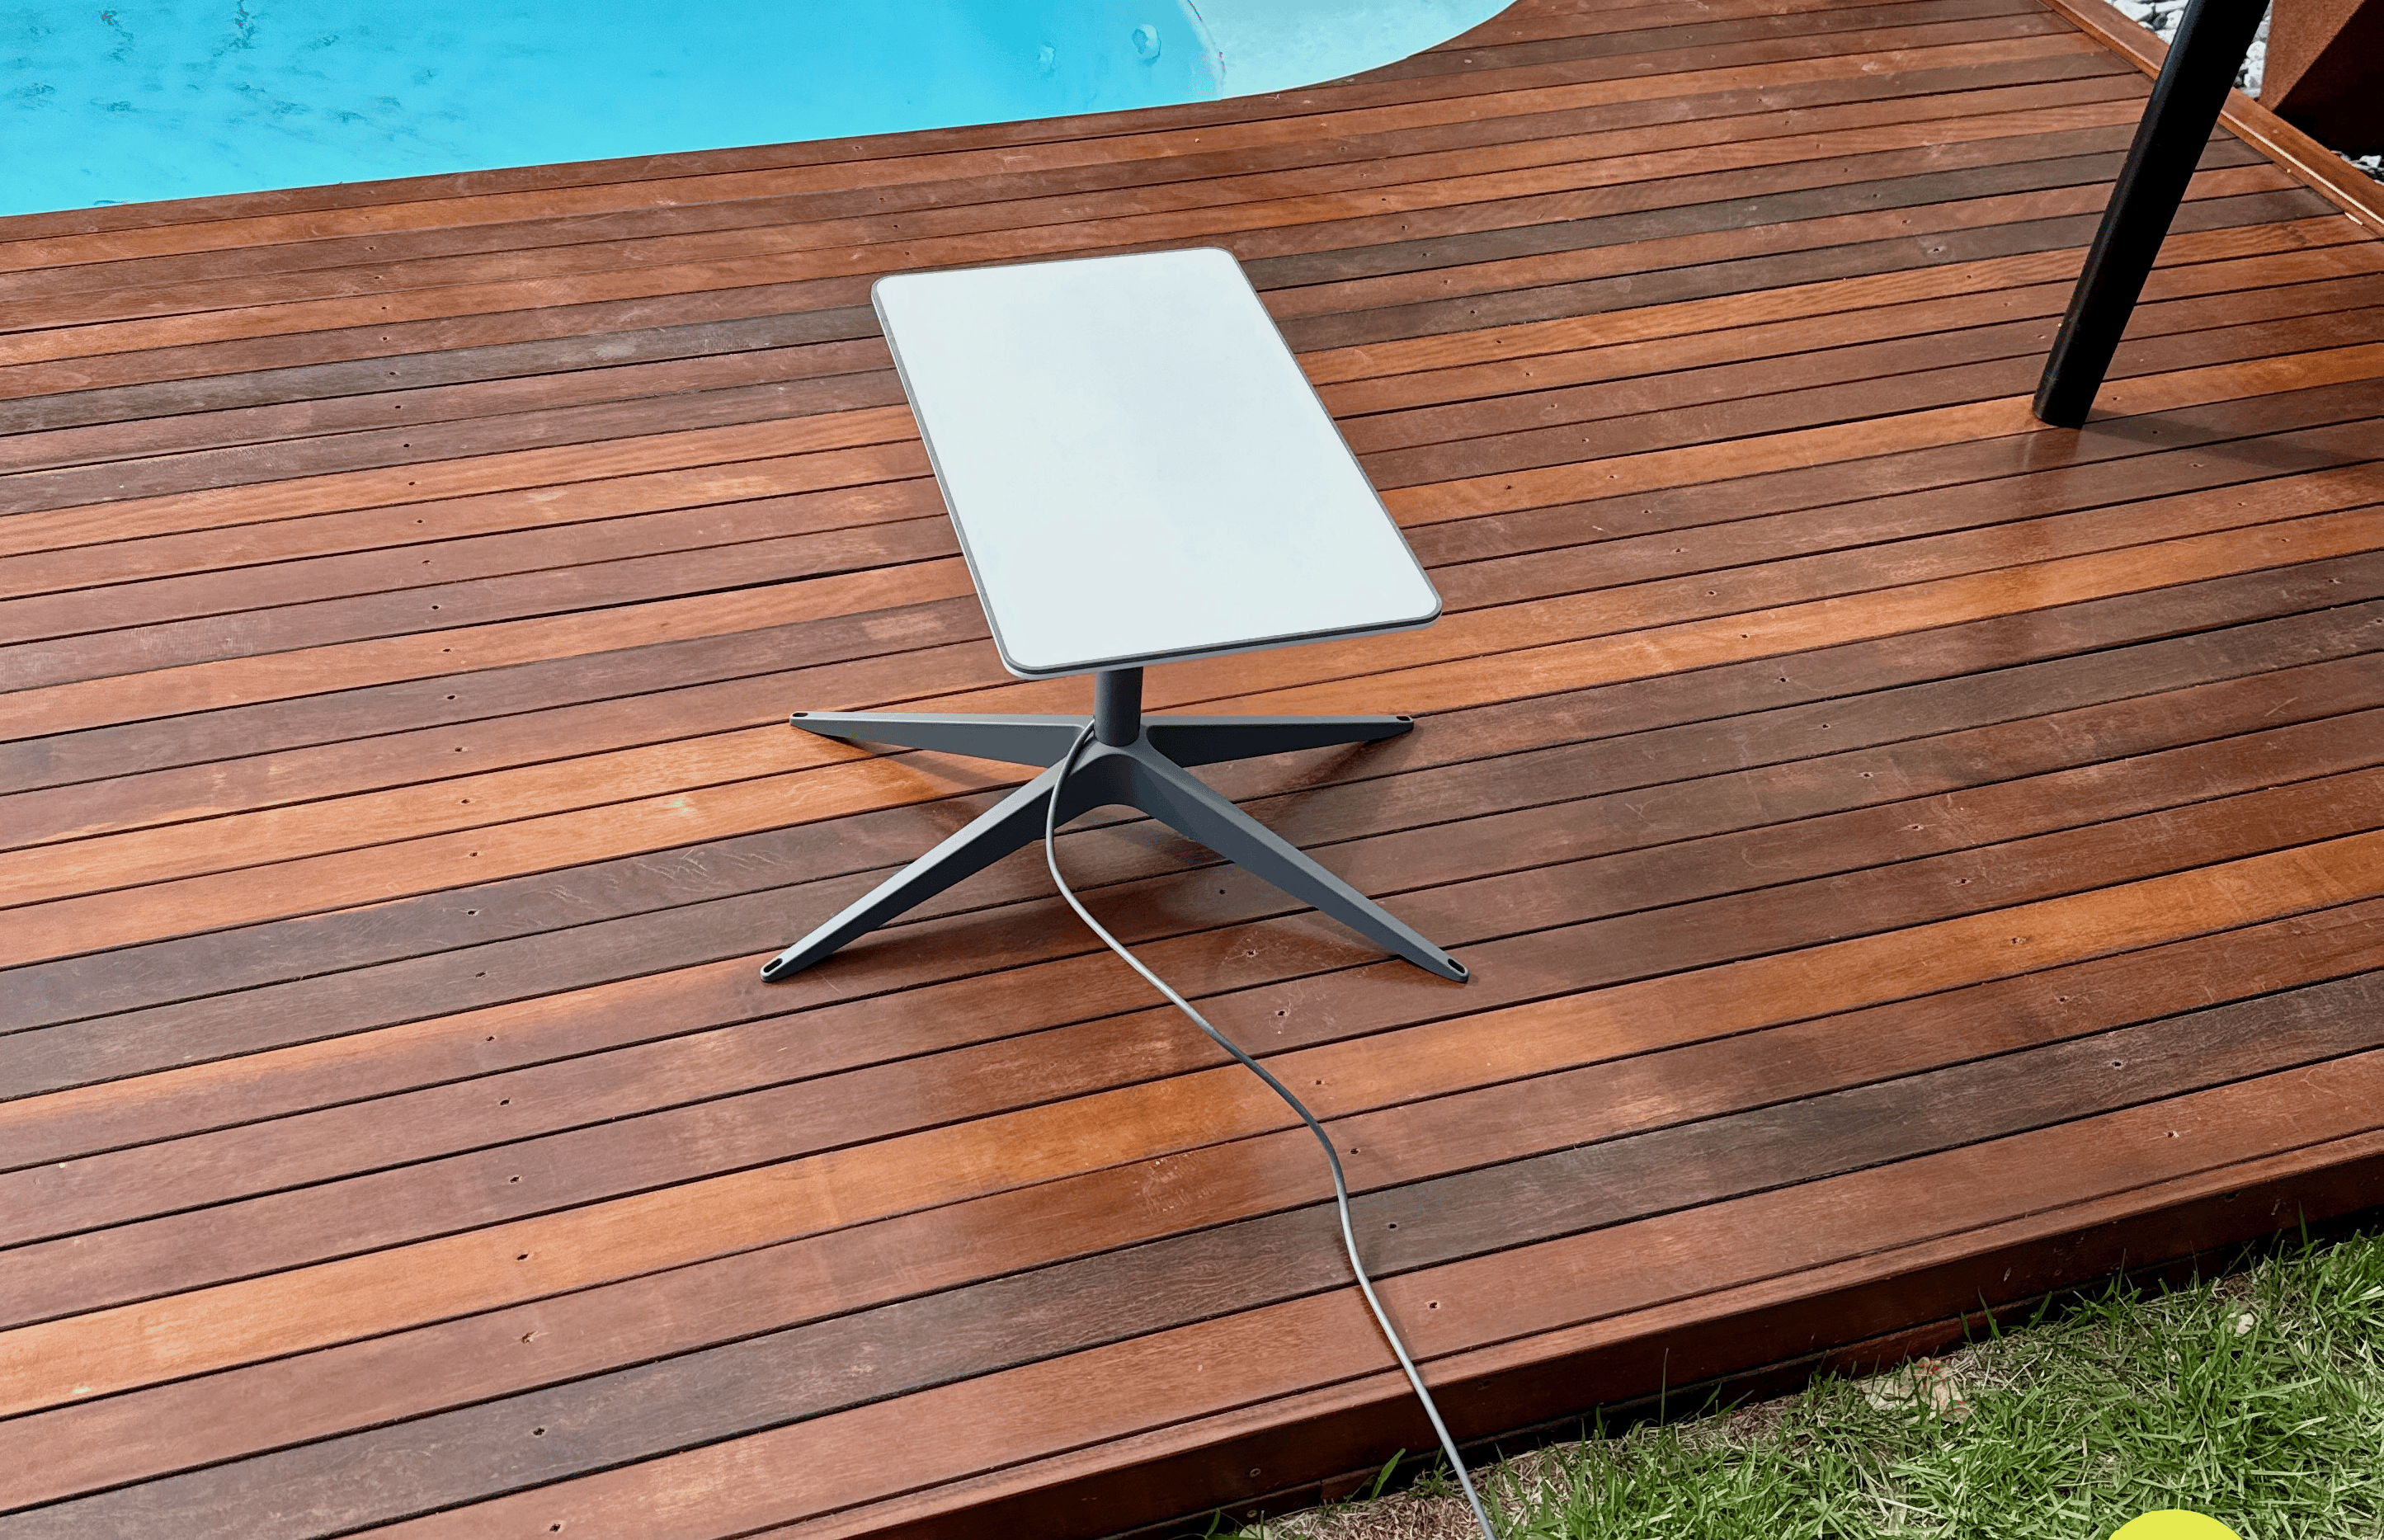
The antenna on the floor (yes, I know, the pool is dirty).
Honestly, it’s pretty dope.
And it makes the installation a lot easier - I can almost forgive the lack of screws.
To test, I plug router with the antenna on the floor somewhere with a clear sky view, and waited a couple of minutes.
Then, I connected to the STARLINK WiFi network, changed the network’s name and
password, and that was it.
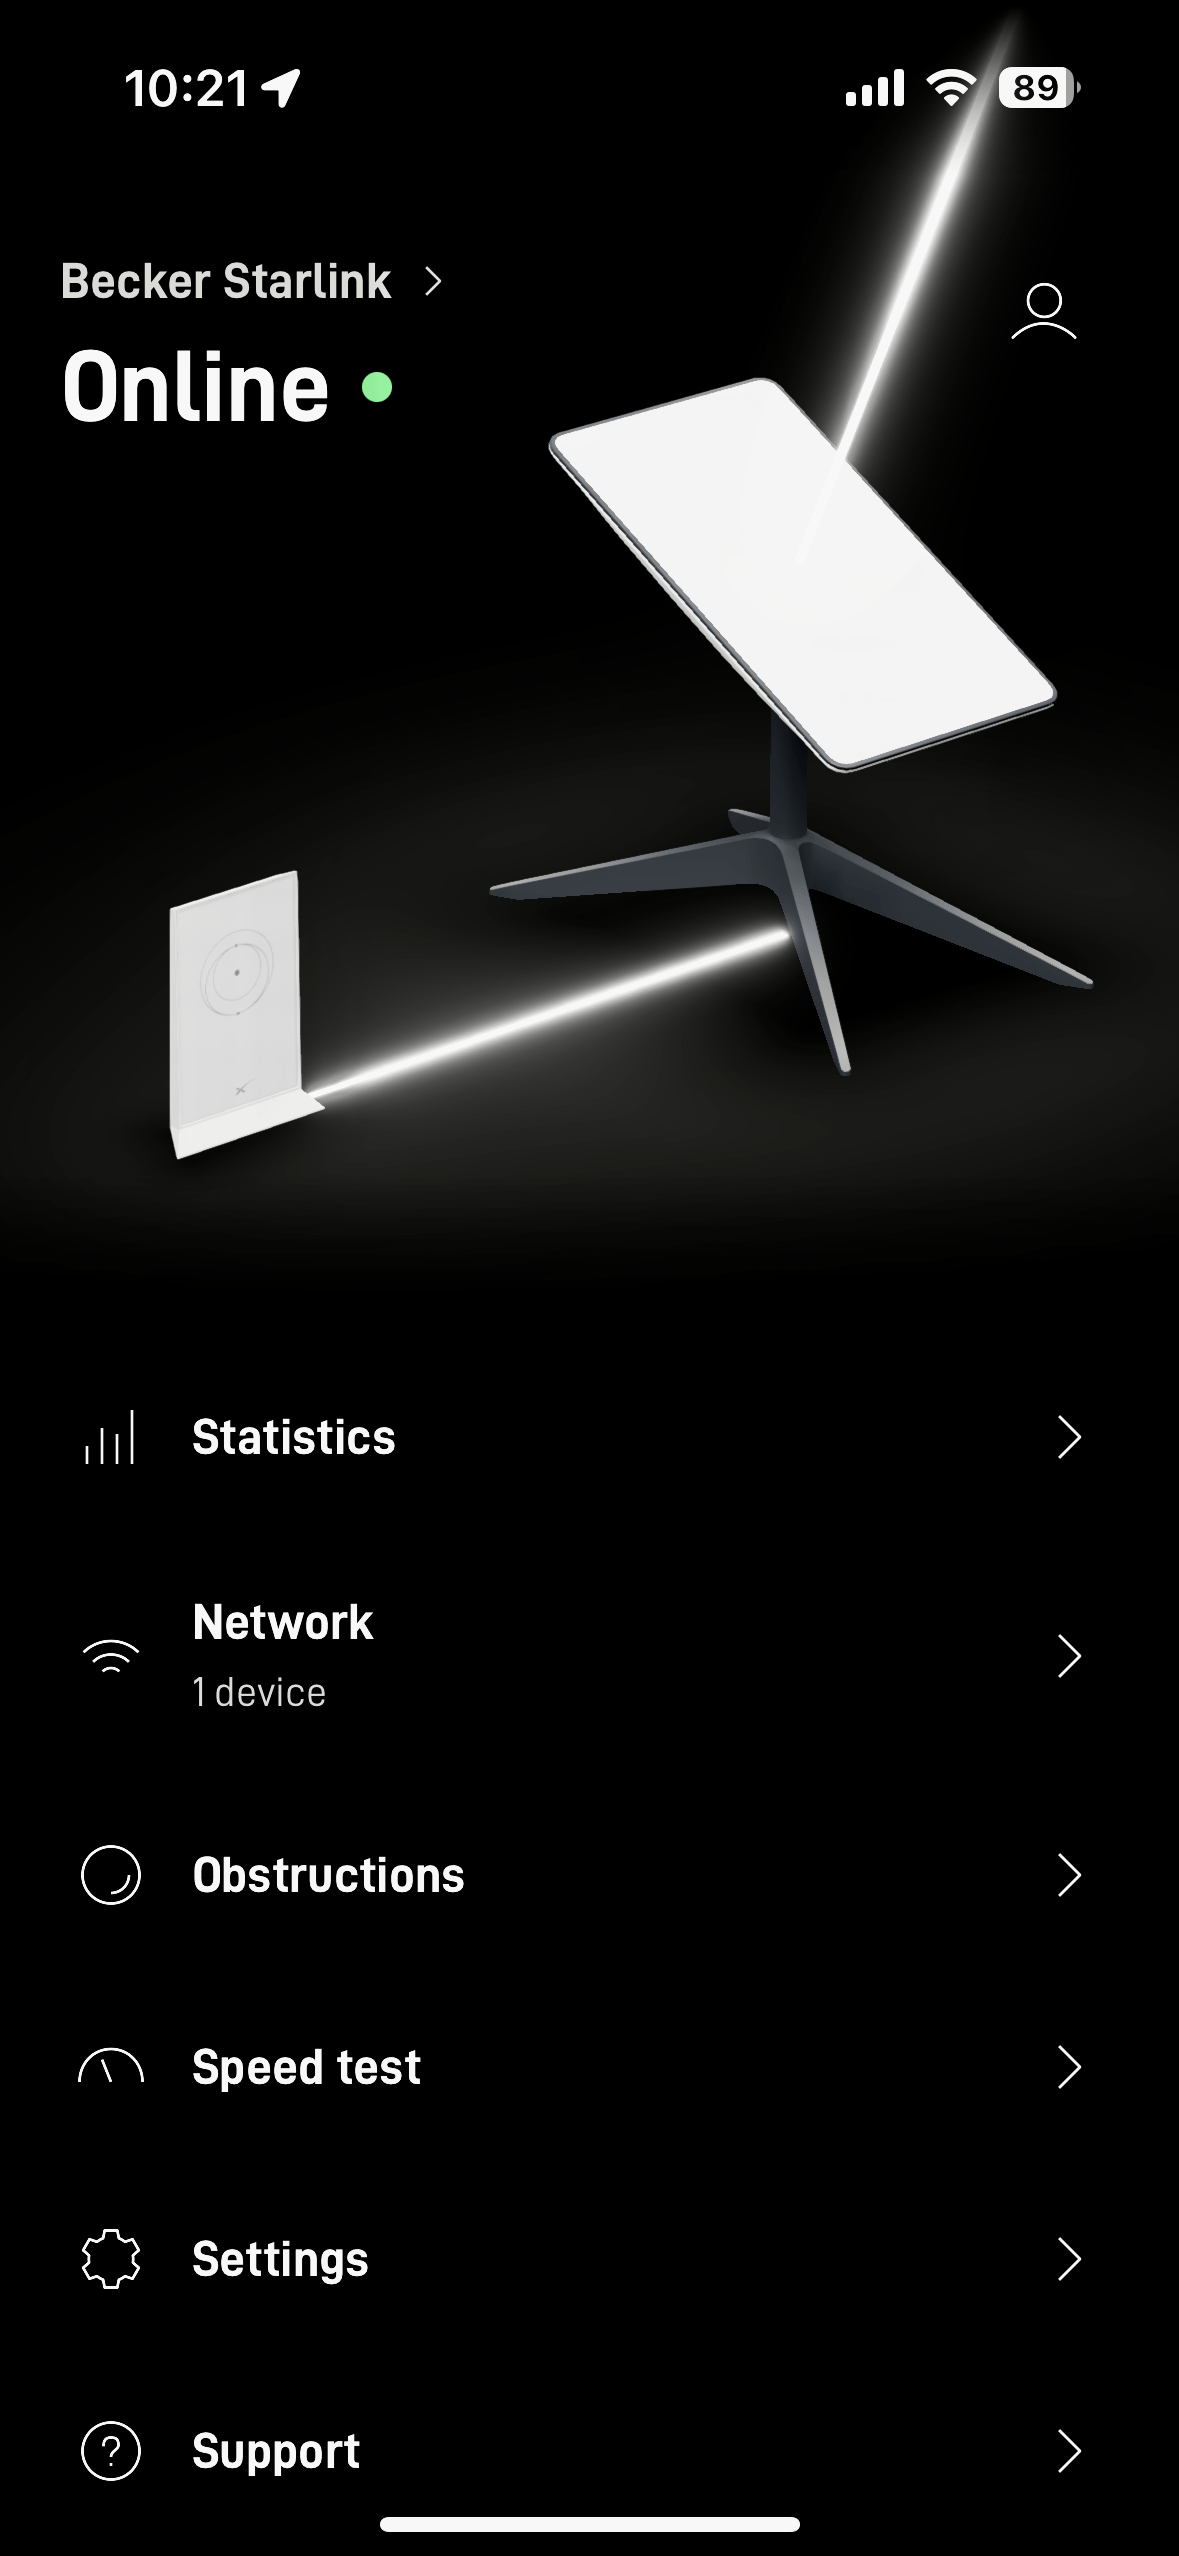
The Starlink app.
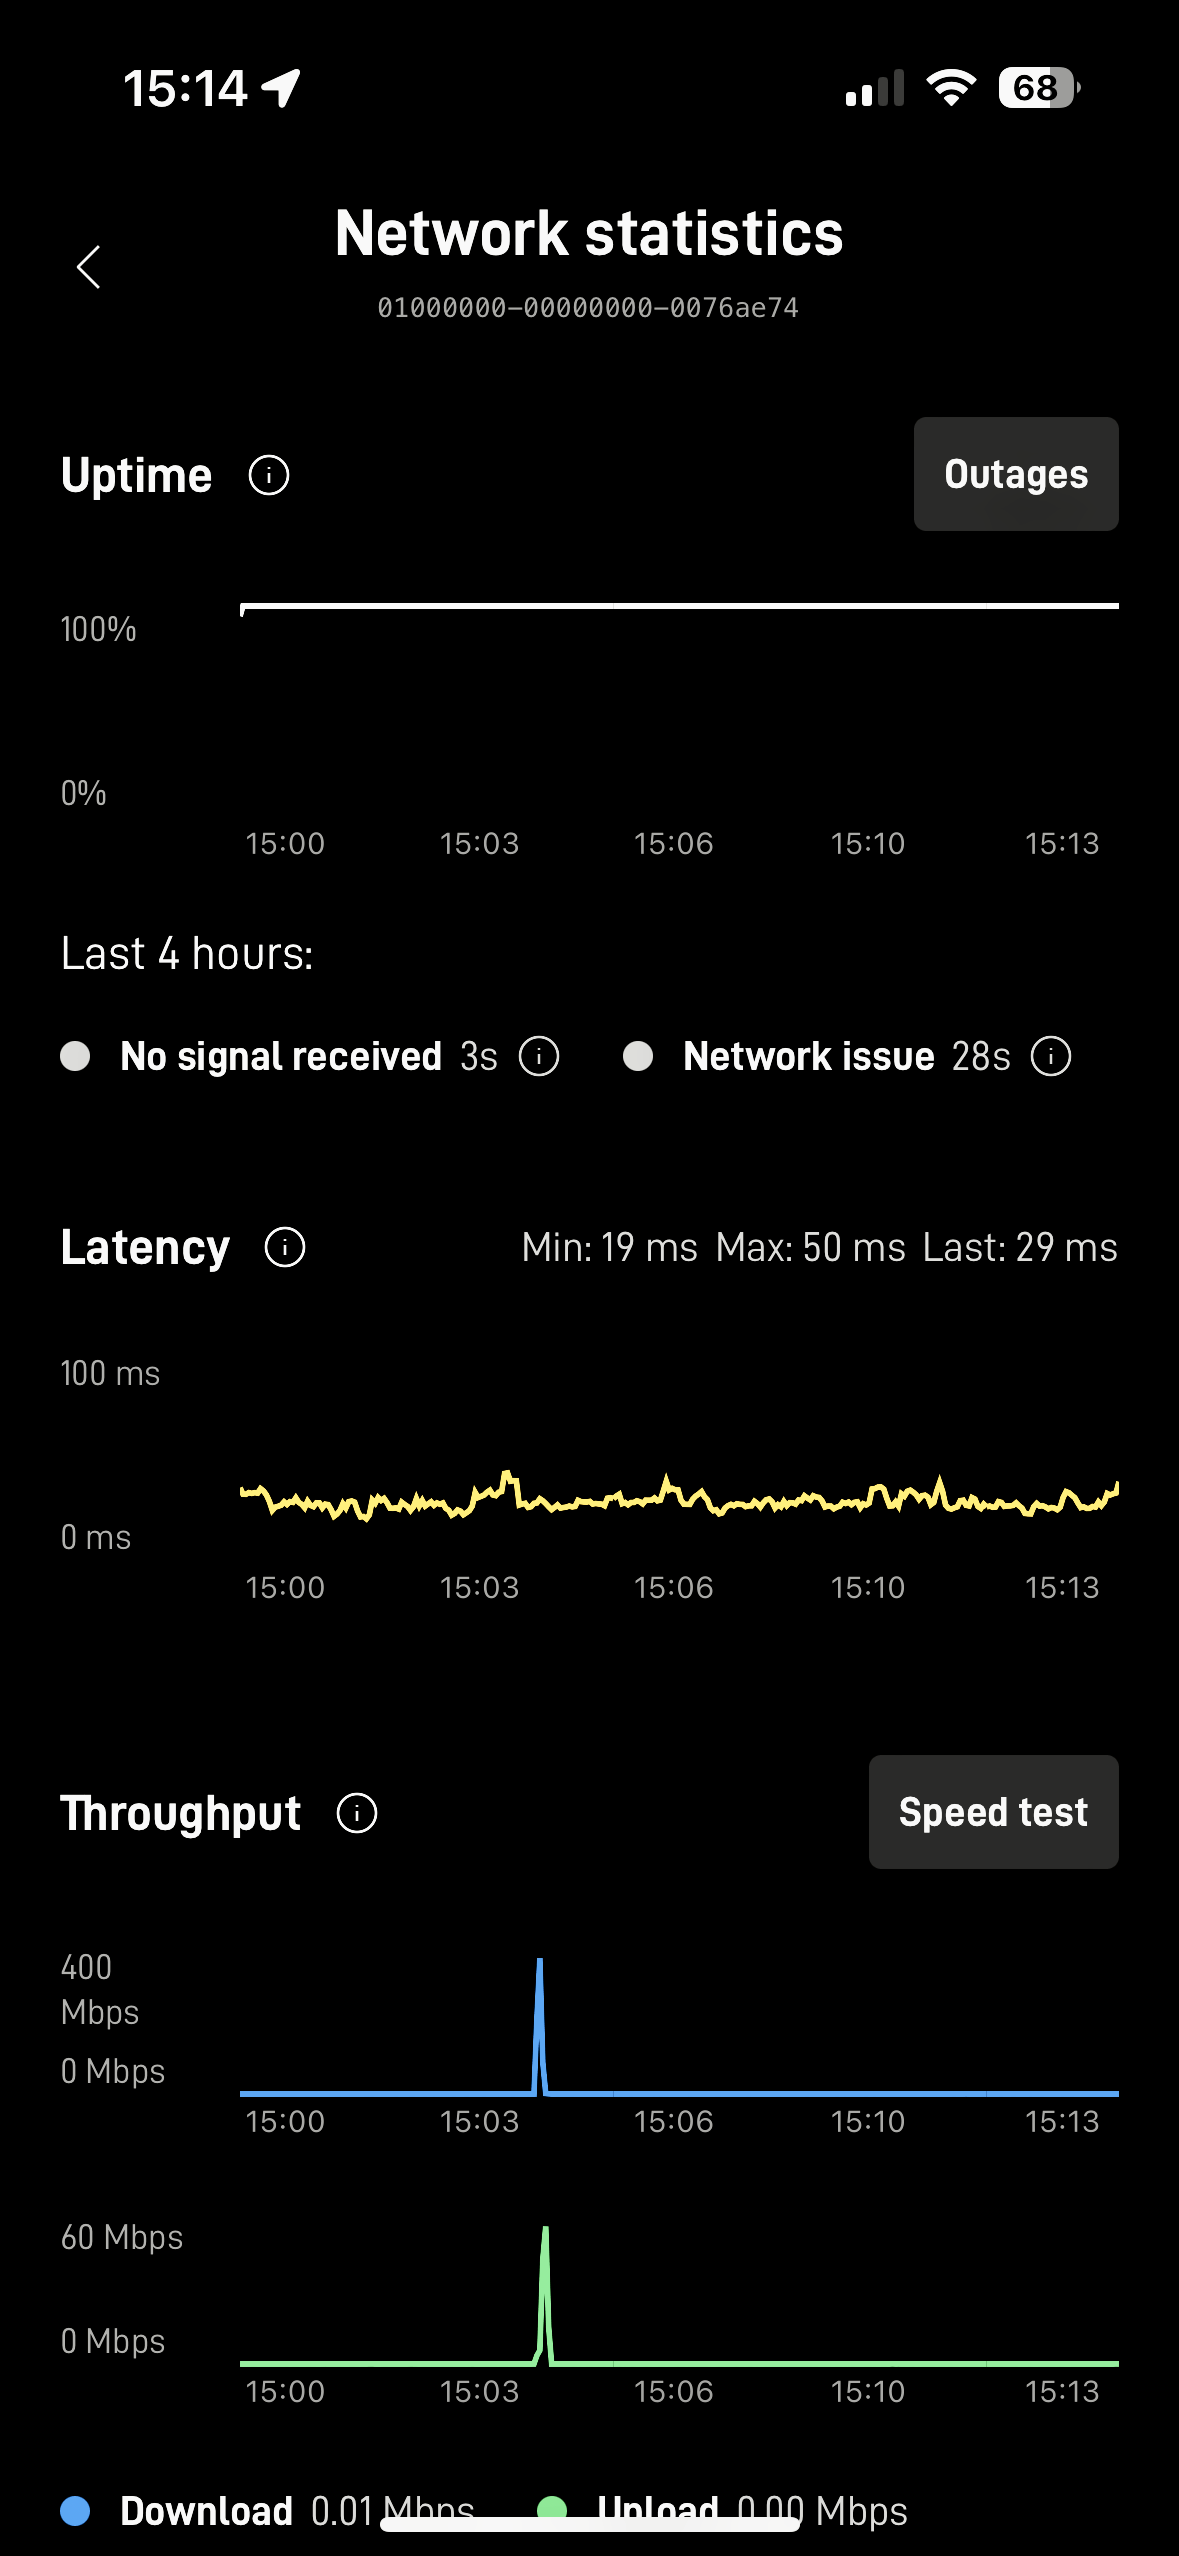
Network stats.
It does take some time to find the satellites and all, which is understandable. Once it does, it’s ready to go and works pretty well.
I’m not sure why, but I thought it would get an US IP address. A bit of a surprise to see it’s from Sao Paulo/Brazil instead.
While looking into it, I found this published CSV file with all the Starlink’s CIDRs and their respective locations.
My IP was 149.19.165.30, and sure enough, its CIDR is there, with the
location.
149.19.165.0/24,BR,BR-SP,Sao Paulo,
I can also check it out in the Starlink Status Page:
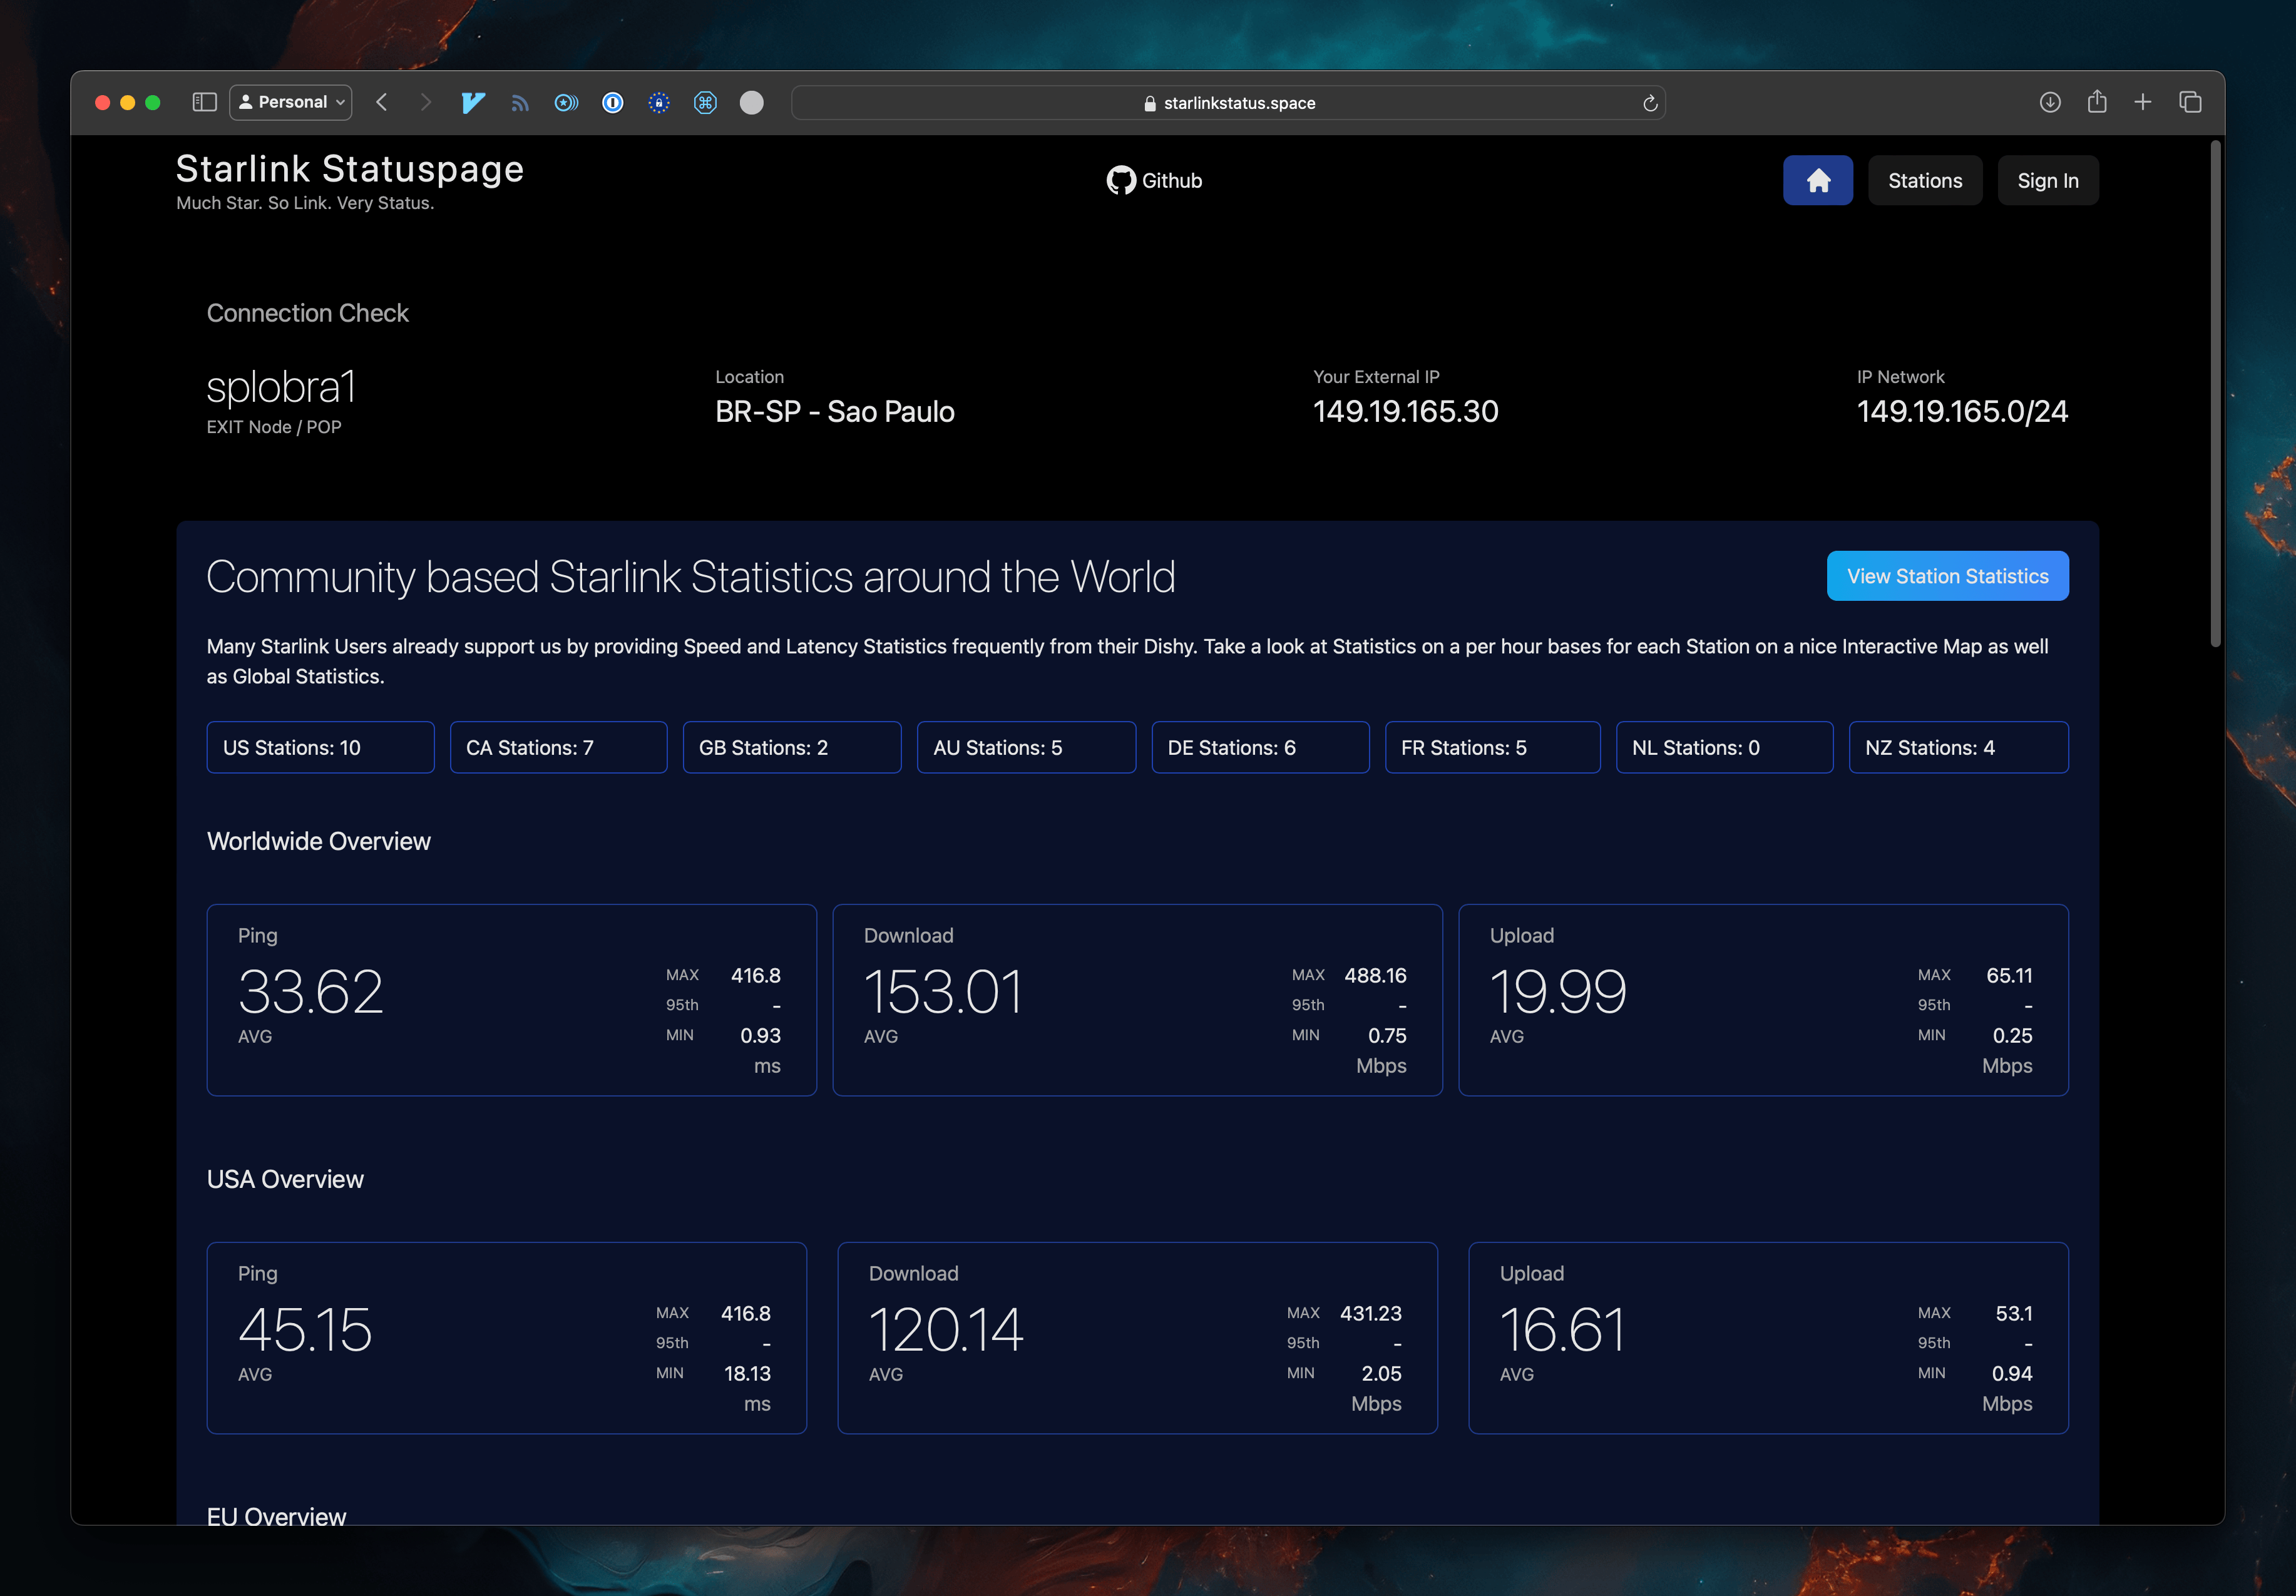
Much Star. So Link. Very Status.
This is apparently a community-maintained page, and its super interesting!
Since my plan to put the router in the network rack was impossible to achieve, I decided to run one more ethernet cable to the attic, and leave it there.
Luckily, I already had a power outlet there, so I didn’t had to run electricity there too.
The cable Starlink provides is reasonably long, around 20 meters, so I had a good working space as well.
I chose a place in the roof in which it wouldn’t shadow the solar panels, ran the cable into the attic, and plug everything in.
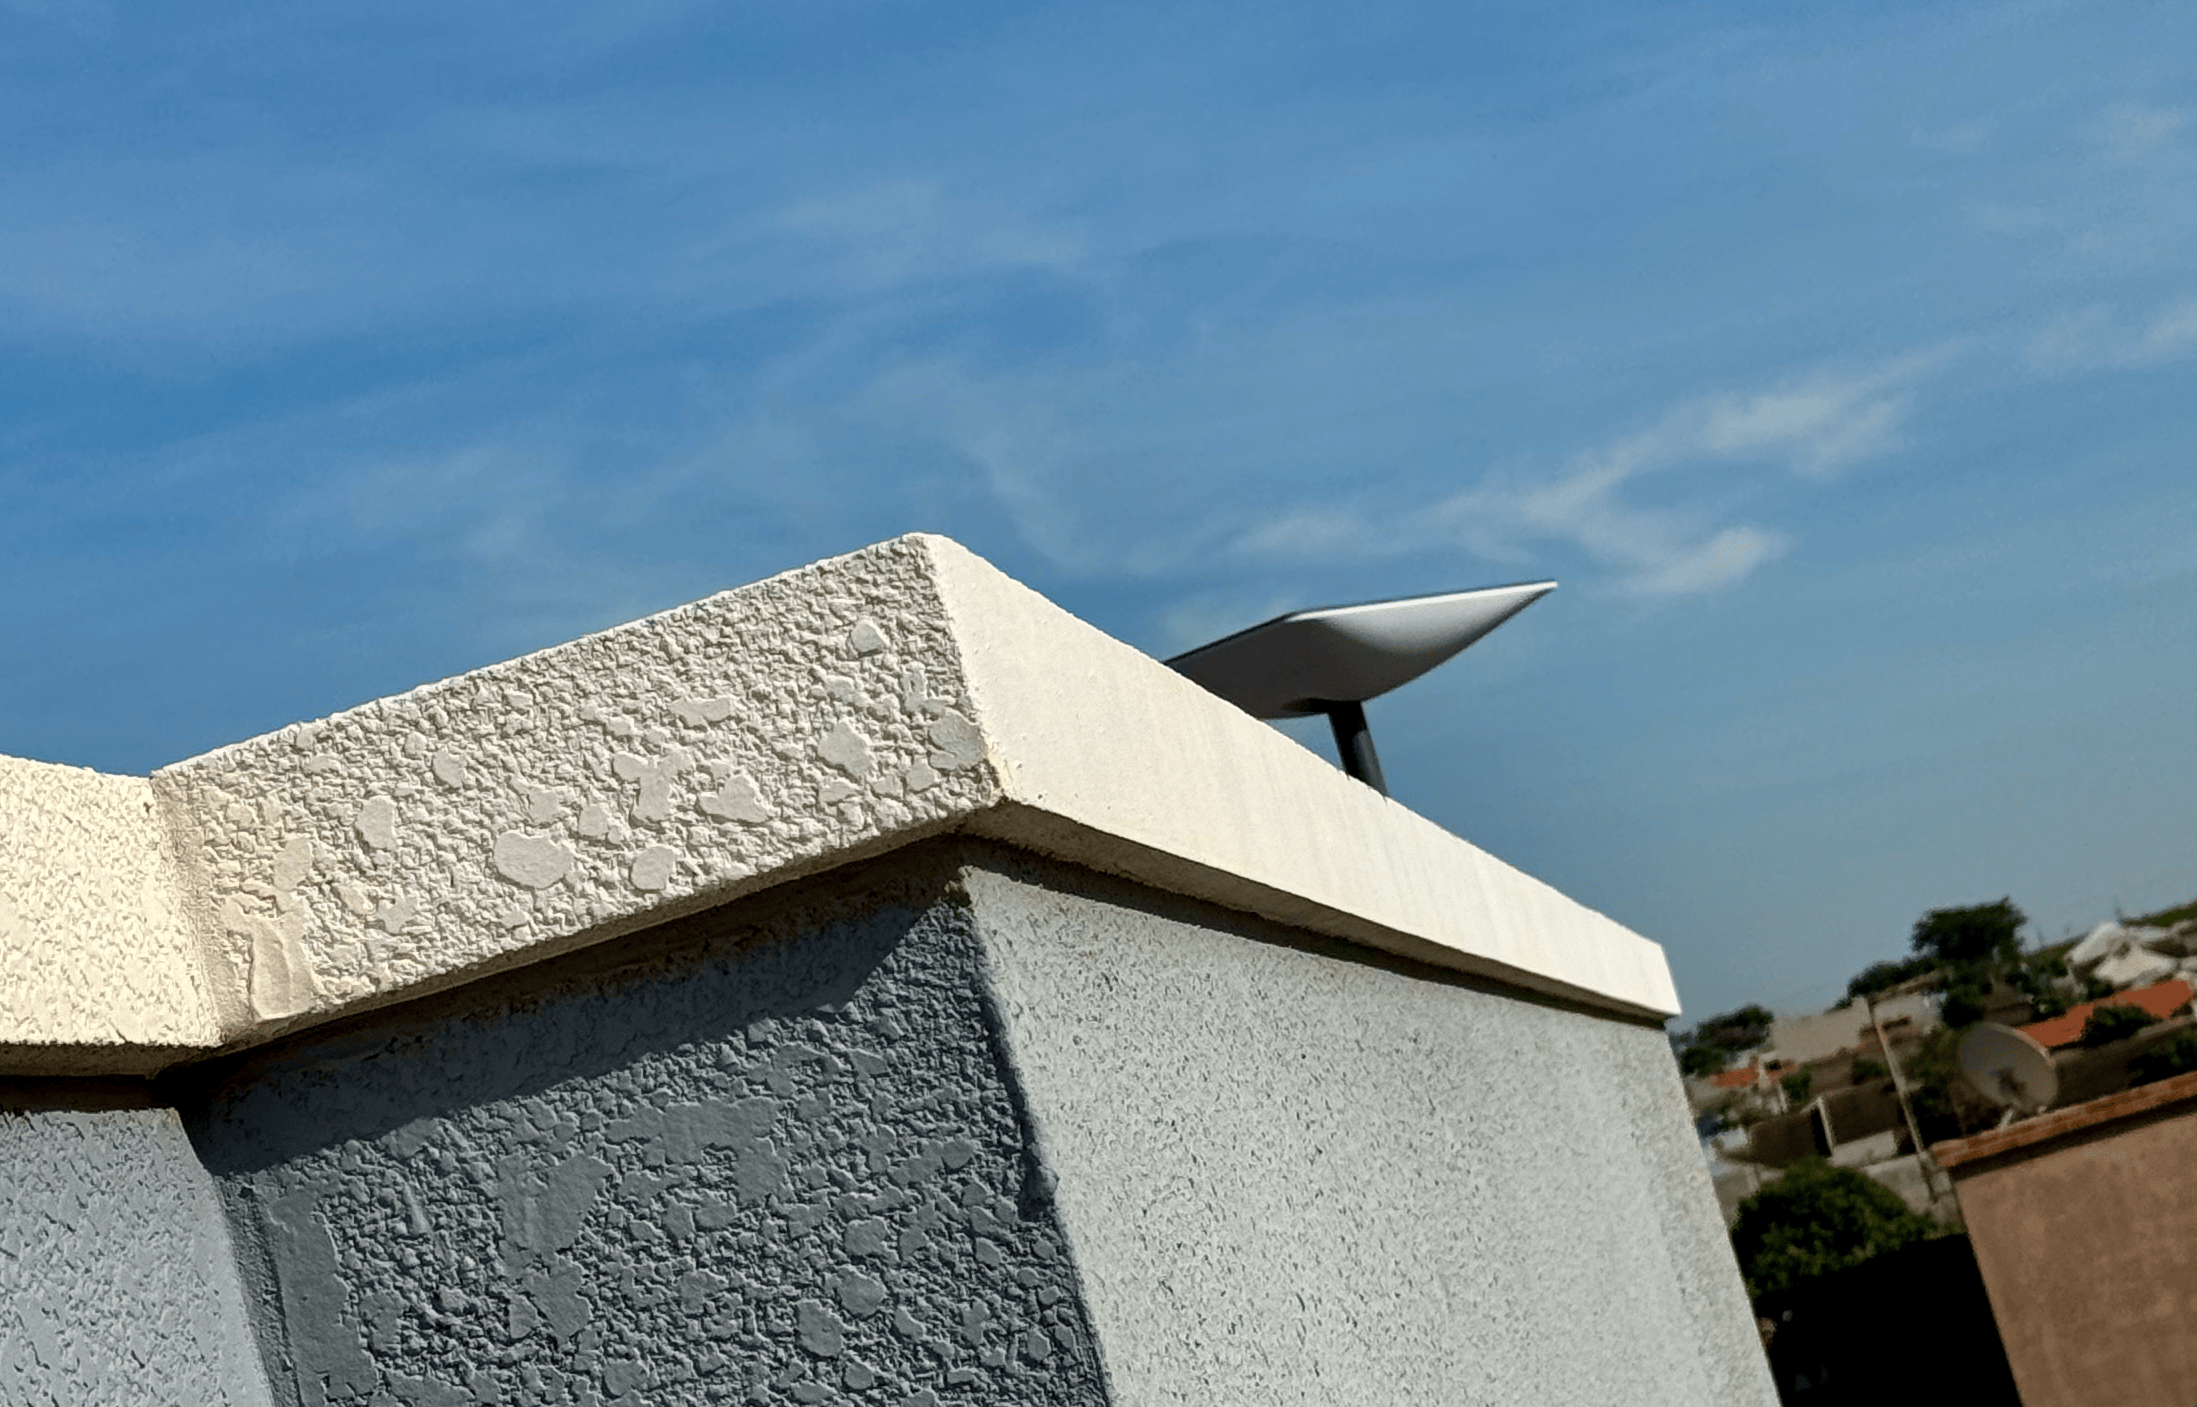
I forgot to take a picture when I was up on the roof, this is the best I could do without climbing too much.

The cable situation is actually better than it looks, I promise!
With that done, I terminated the ethernet cable, and connected it to my UniFi Dream Machine Pro (UDM Pro).
UniFi showed the connection as FE4, which was a surprise.
Yellow means things are bad.
A cable tester is a very good investment, mine is a shitty one, and it only shows if the connections are there, and if the cable is wired properly (in the sense of no cross connections). It didn’t show anything wrong for this cable, but it still couldn’t get a gigabit a connection. So, I re-terminated both sides, and now everything is good!
It turns out, it was probably my skill issues when terminating the keystone in the network rack.
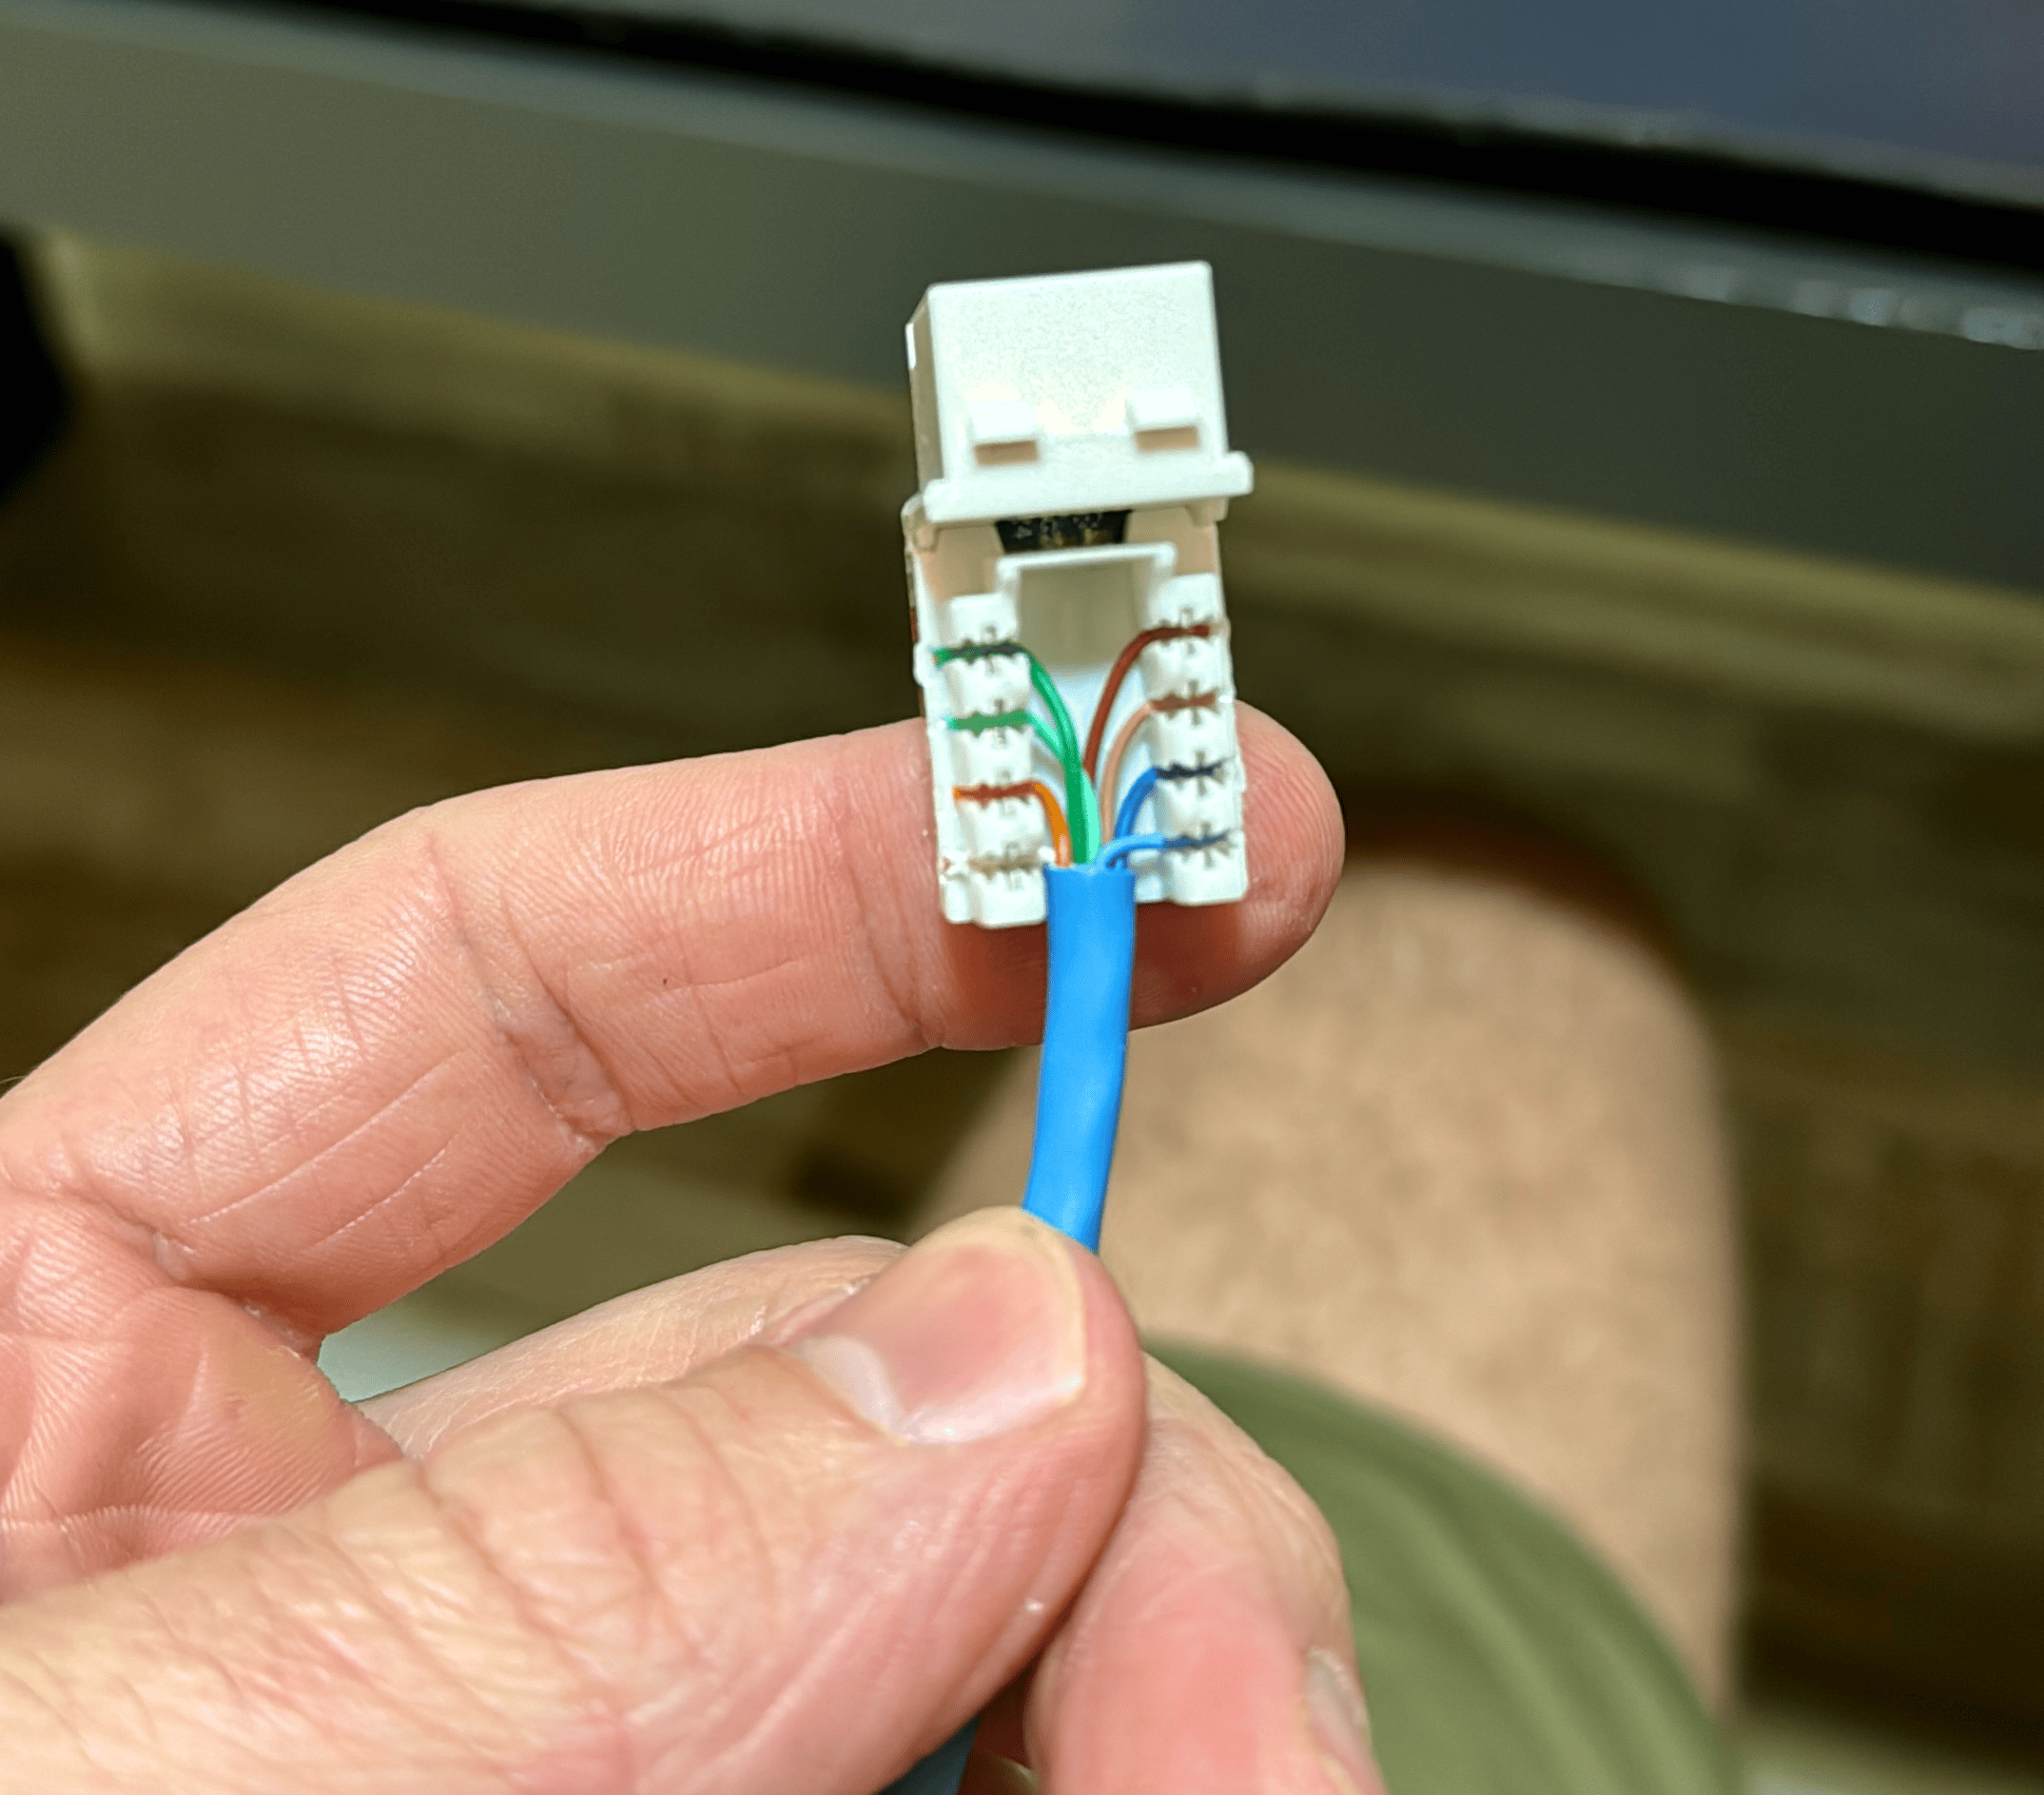
Skill issue.
Anyway, as you can see in the screenshot, my main ISP connection was also FE only. Funny enough, disconnecting and connecting it back yield different results every time.
Since I had my hands dirty already, I re-terminated that cable too, and replaced the patch cable too (which I tested and seemed to be broken somewhere).
Green is good.
Now everything is GbE5!
I still had the Starlink’s “Becker Starlink” WiFi SSID, and I wanted to get rid of it.
Reading their manuals, it seems that what I needed to do was put the router in bypass mode.
When I went to do that, it gave me every warning possible, like I was about to kill the router forever or something.
Nevertheless, after some minutes applying the configuration and rebooting (I guess), it worked!

The app changes a bit once in bypass mode.
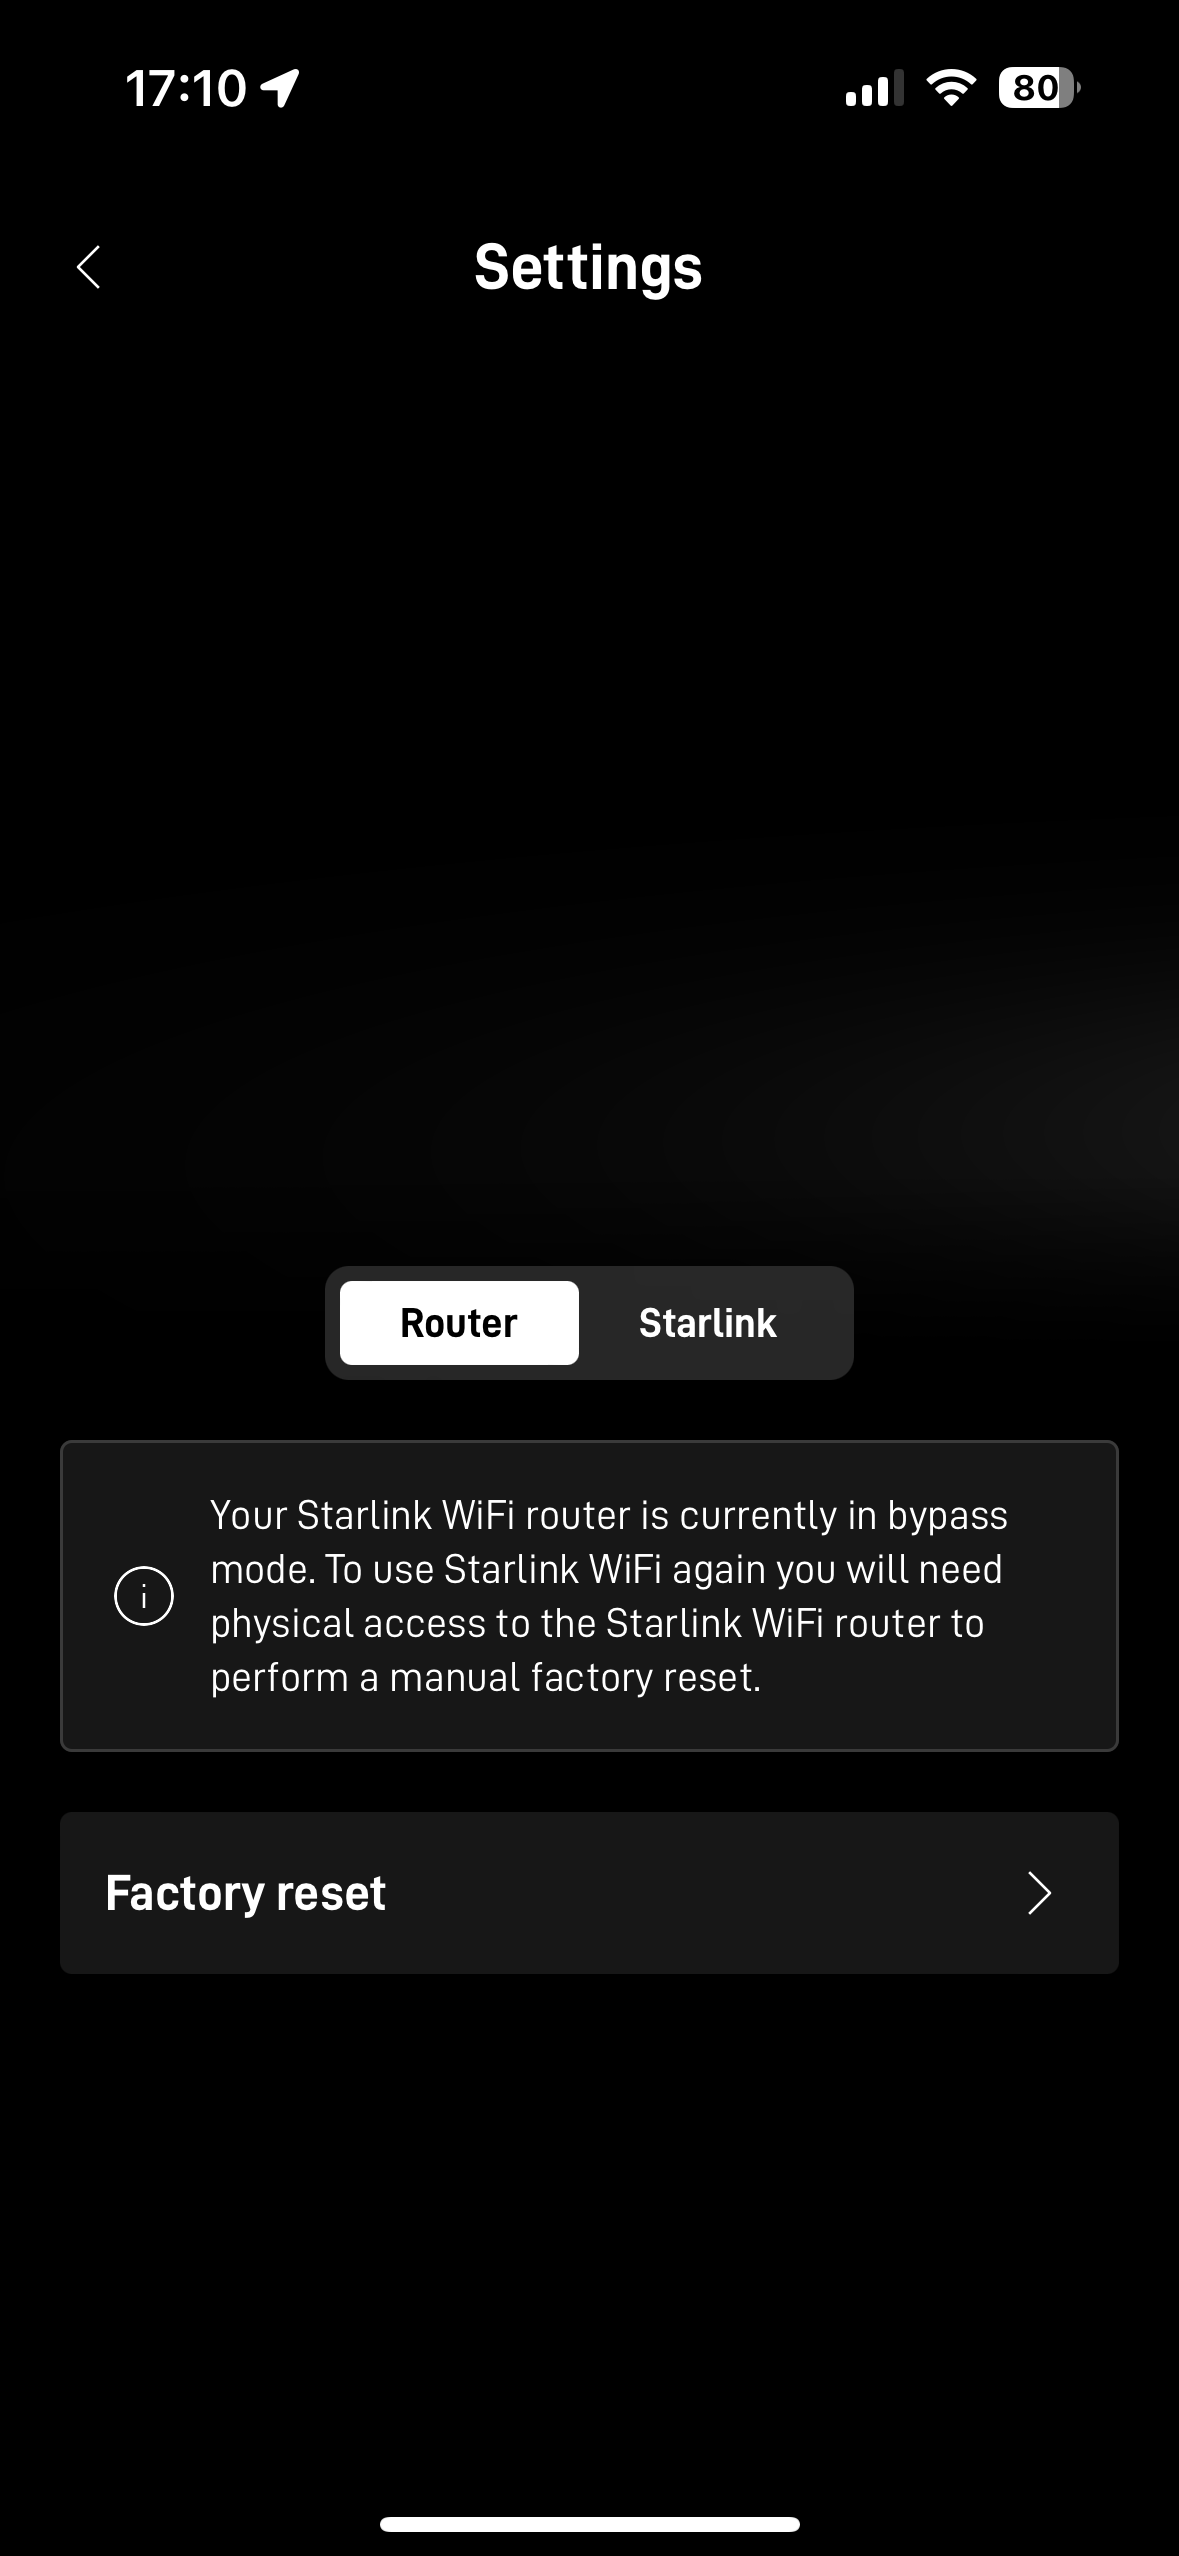
Only way to revert it is to factory reset. 😂
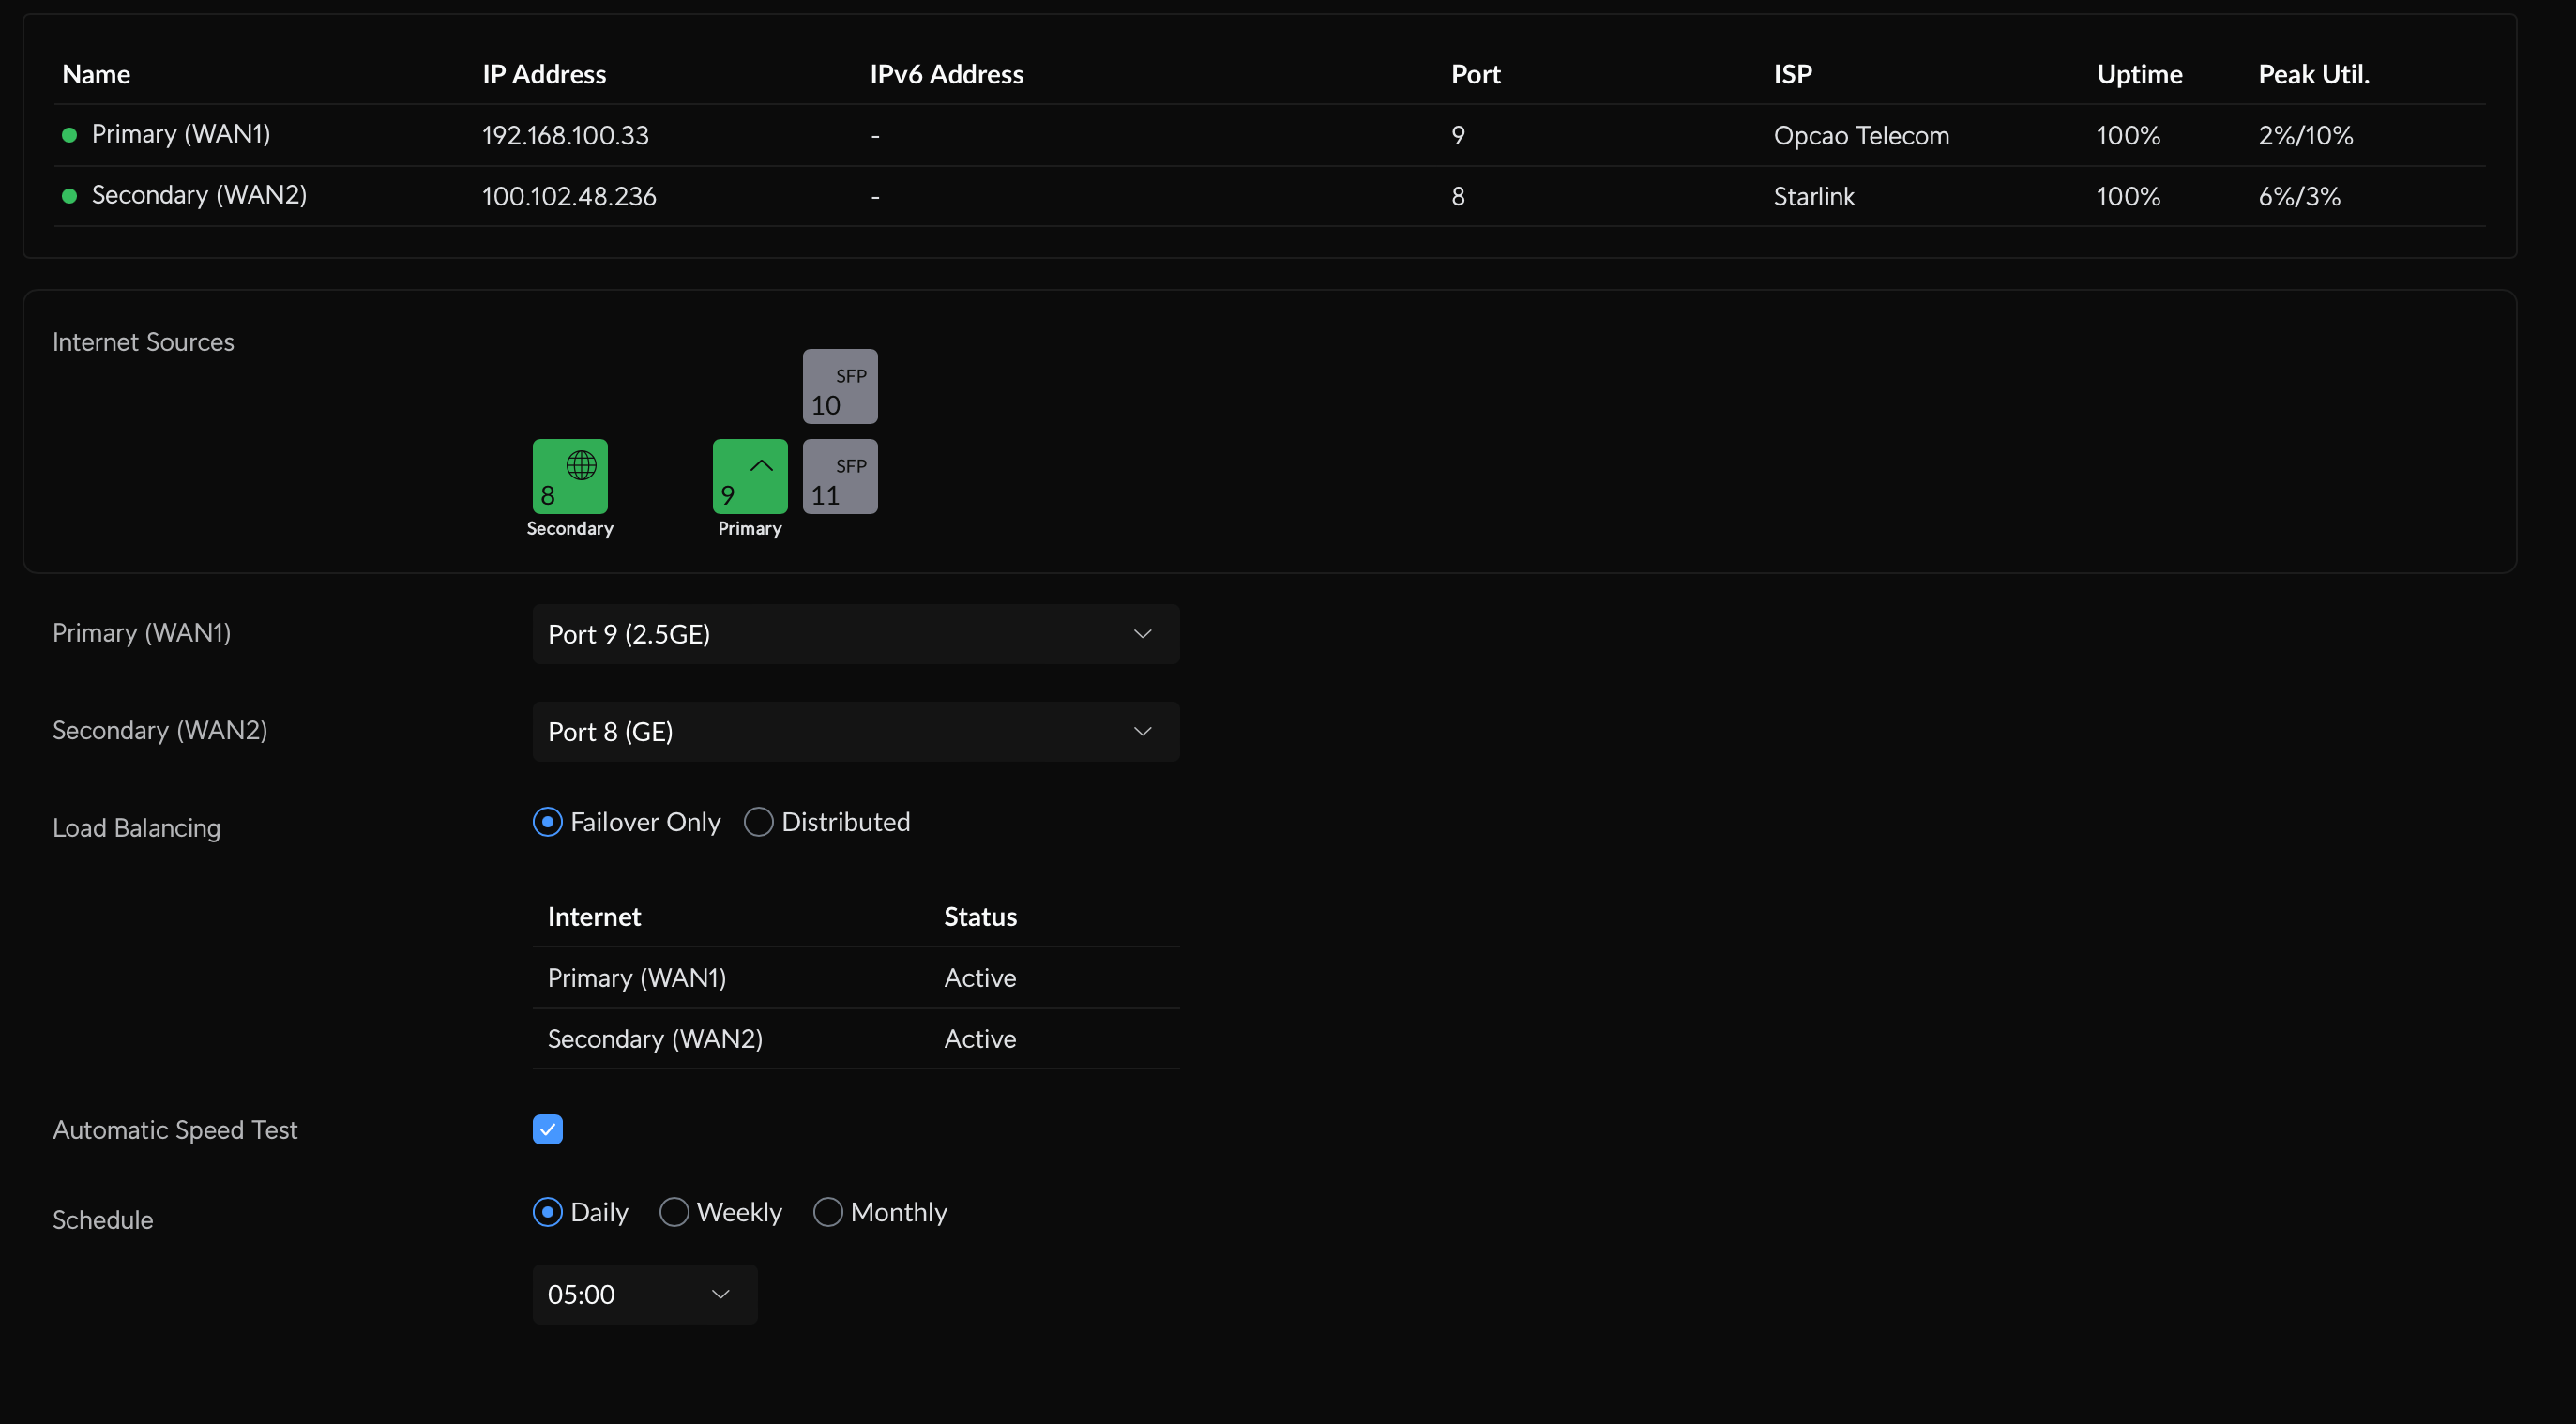
Now, instead of an IP in the 192.168.1.0/24 CIDR, I got the 100.102.48.236
address - which is perfect, as it doesn’t conflict with any of my subnets.
FWIW: if it did conflict, per my research, I would have to change my subnets, because Starlink doesn’t allow to change the local CIDR, because… reasons, I guess.
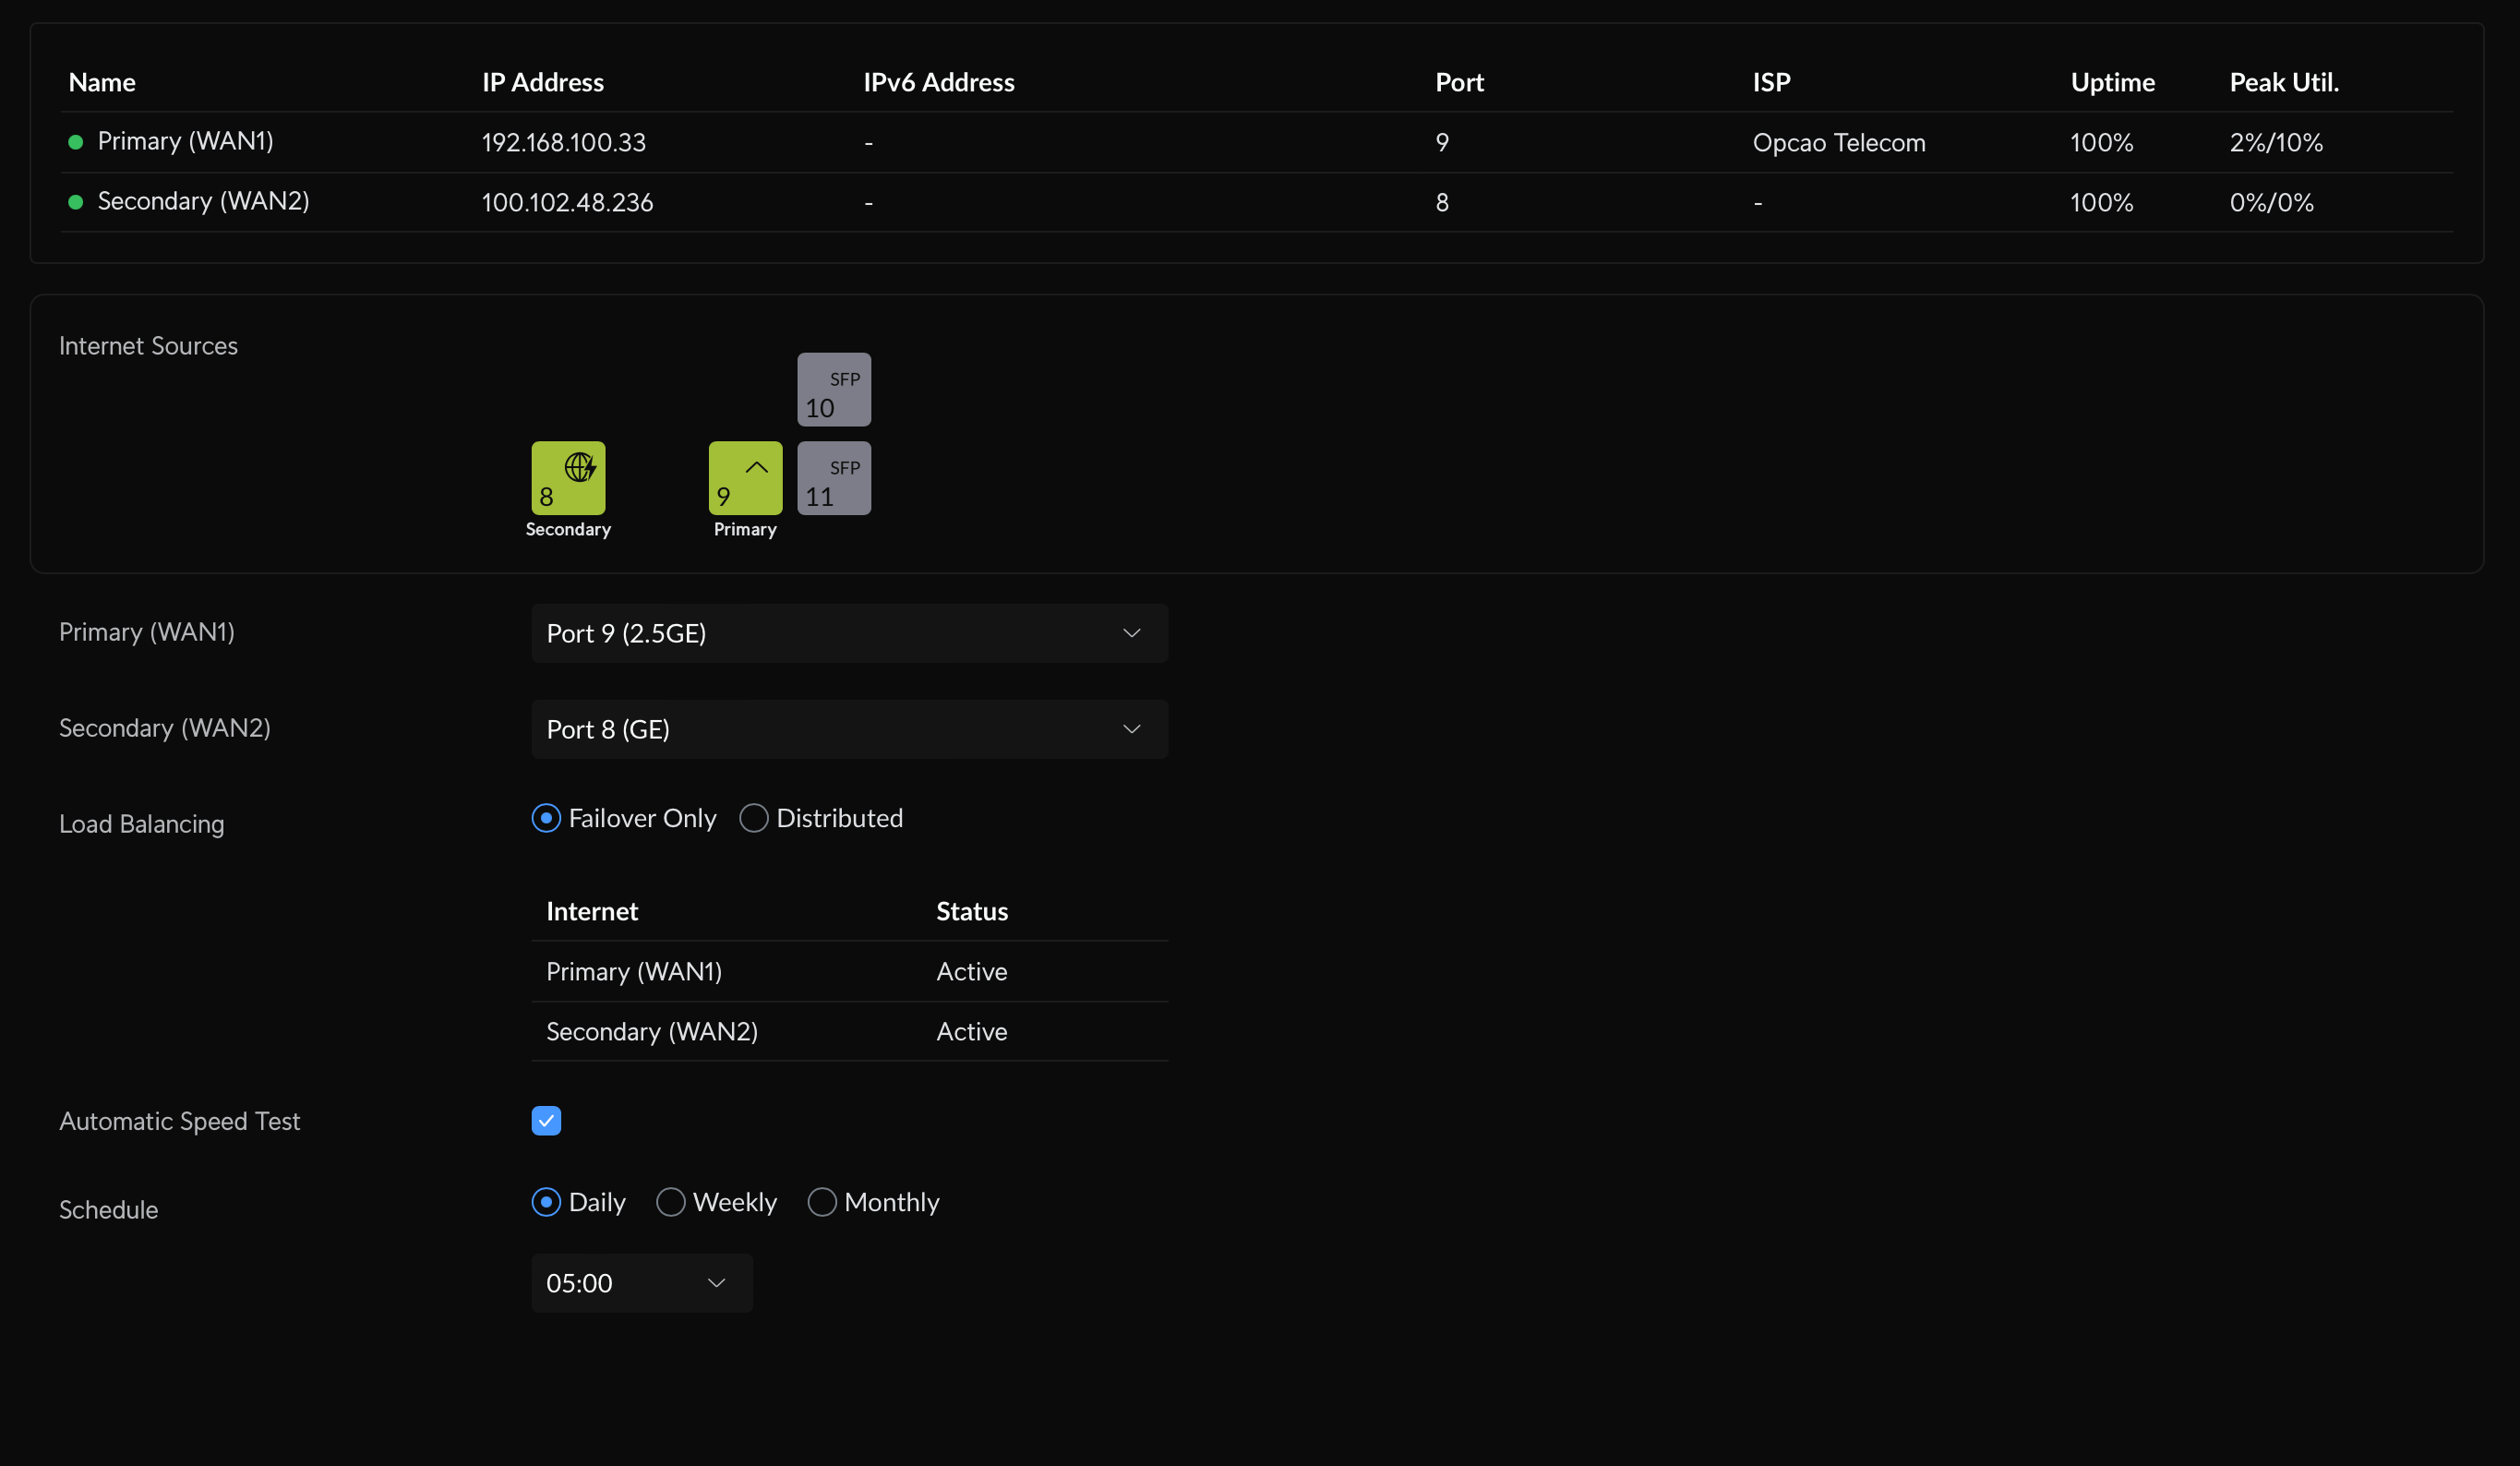
Since my main ISP, when it works, gives me ~900/900 Mbps connection, I think its reasonable to use the Starlink as the secondary link.
Load balancing is possible with the UDM Pro, albeit my previous experiences with that is that some sites don’t work well, specially bank’s fraud detection systems, if it gets a different source IP for every other packet.
So, I set it as a fallback, and added some manual routes for some sites.

Using the secondary link.
To test, I tried removing the cable from the main ISP, and UniFi pretty much immediately let me know it was using the secondary link. Pretty neat.
Still need to see how it’ll behave when the main link is just bad, but not down. If it doesn’t fallback automatically, I can always just unplug the cable, but I really wanted it to do it by itself.
The UDM Pro also allows to define custom routes.
So I created one called “Prefers Starlink”, and added some domains in there.
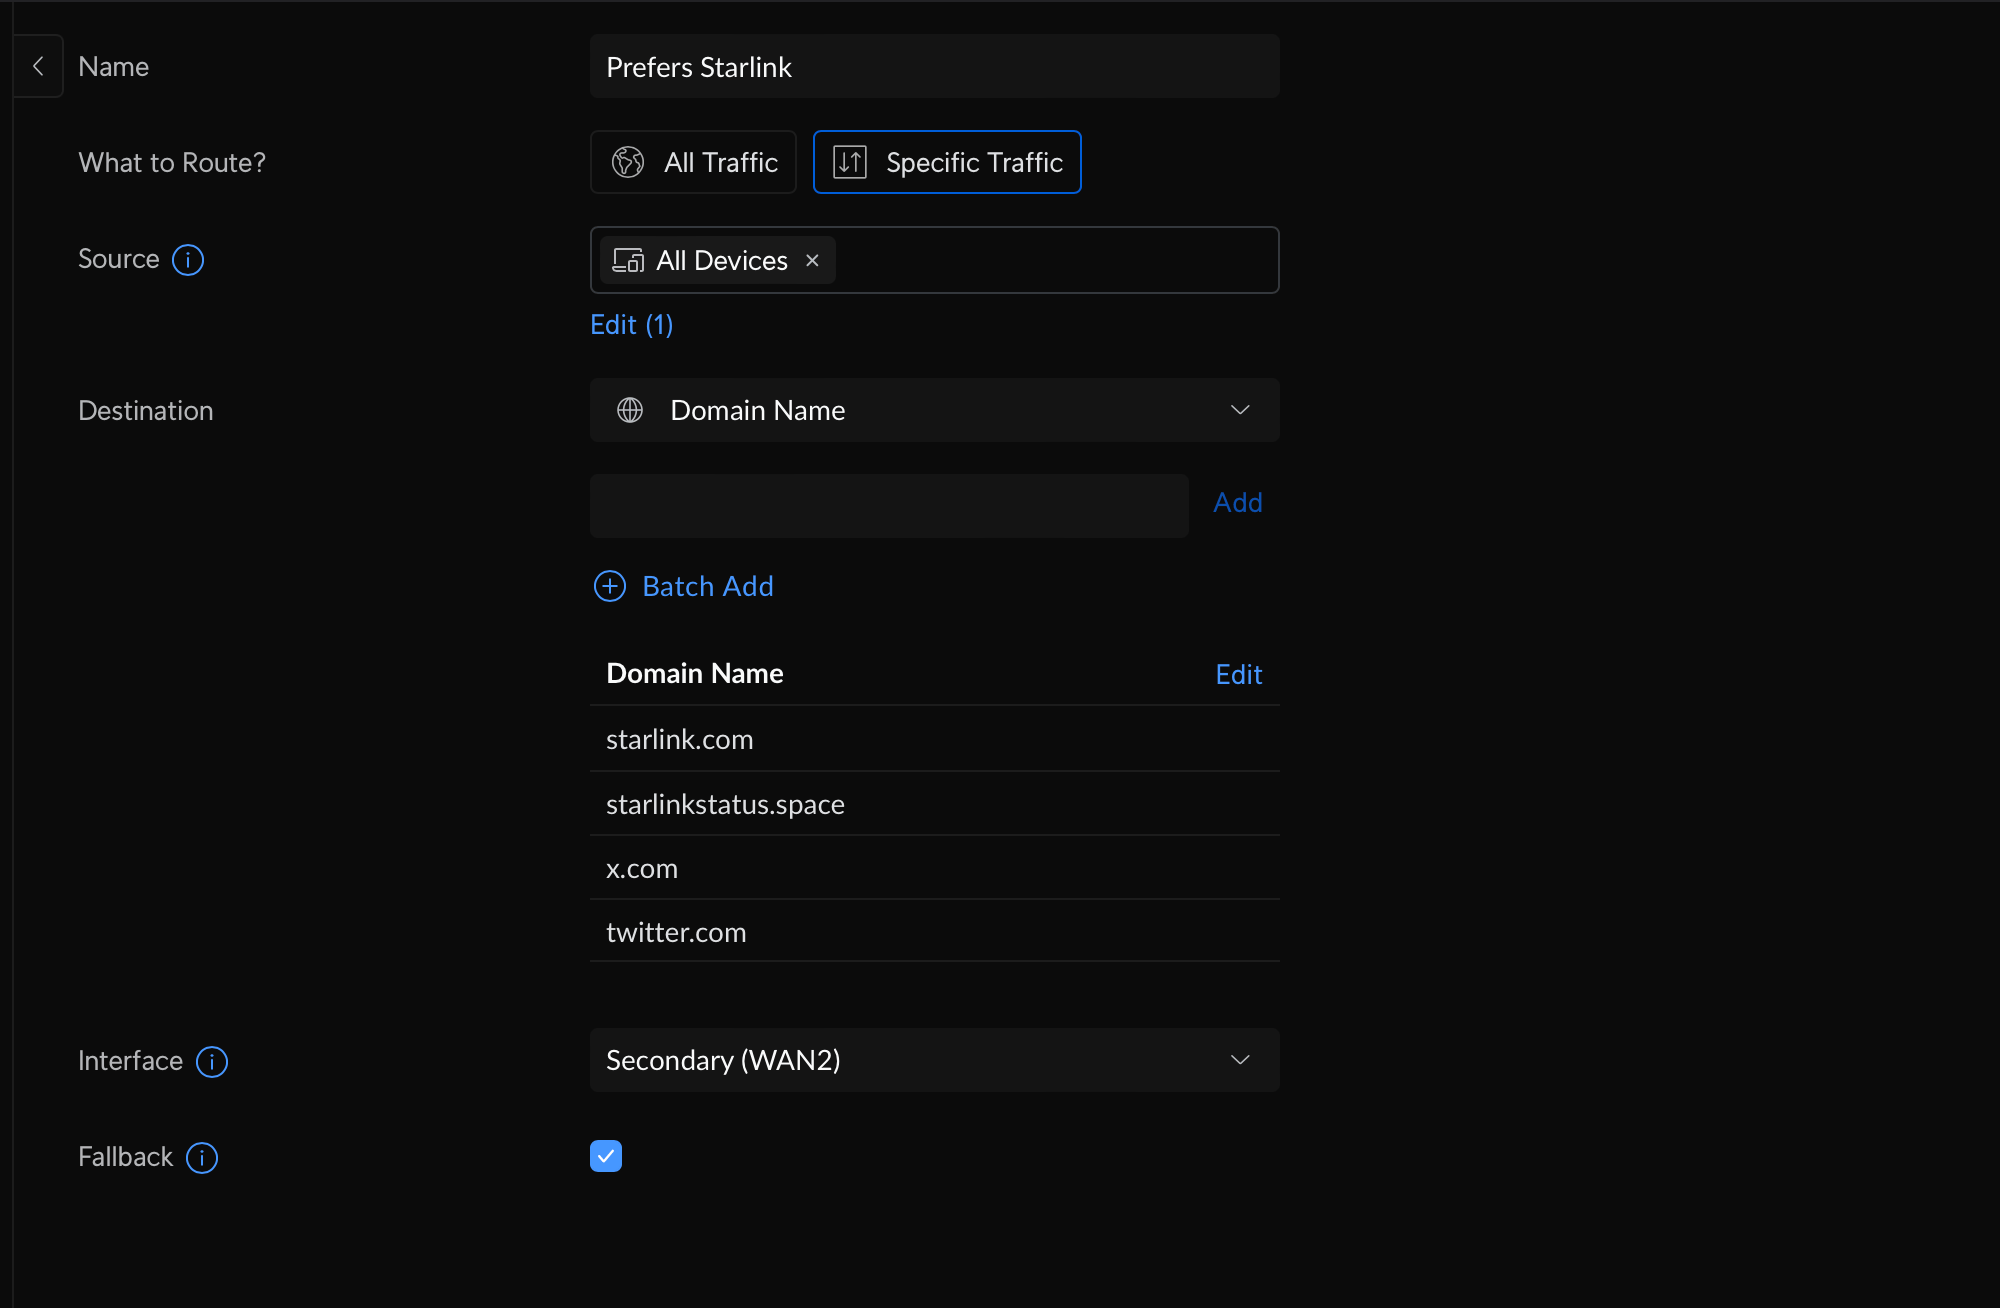
Custom route.
Mainly: the Starlink domain (which seems to make their app connects faster), a Starlink Status Page, and Twitter/X, just because.
Will probably add more in the future.
Measuring in a pretty clear sky day, I got around 300 Mbps down and 50 Mbps up, with a ~30ms ping.

Speed tests from UniFi.
Not awesome, but pretty good. More than enough for working and watching funny dog videos.
I also measured it using the Starlink router and app:
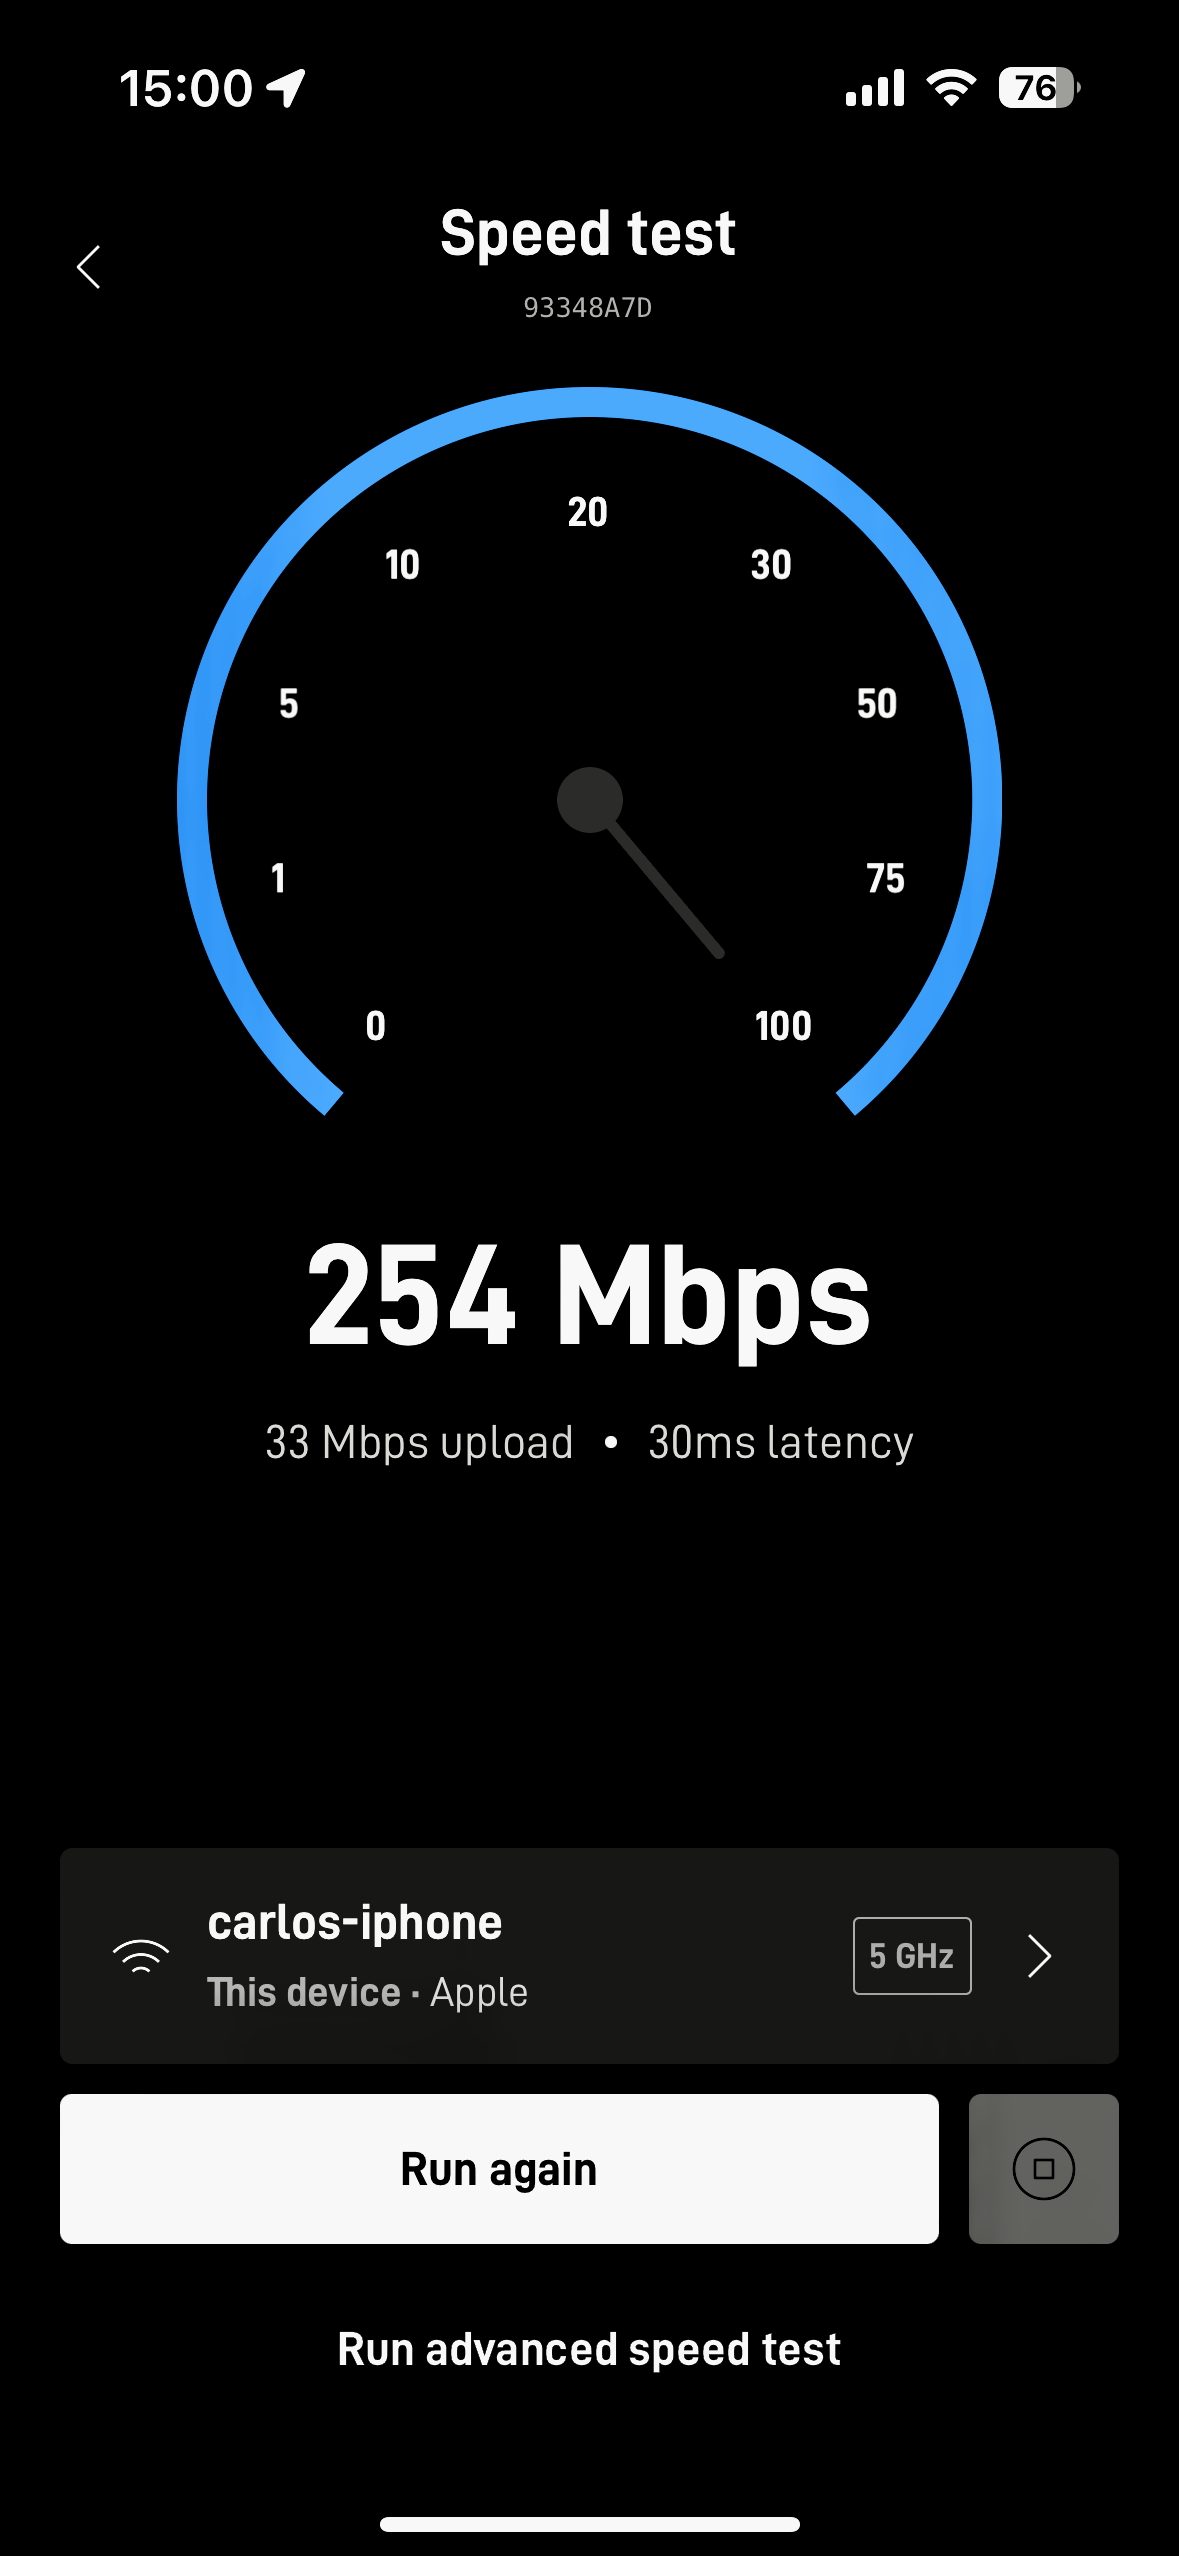
Speed tests from Starlink.
Worse results, but a single test isn’t statistically relevant, so maybe it would get the same speeds as running through the UDM.
I don’t know yet. 😅
The missing test is on a bad weather, but since it arrived we have had nothing but clear skies here, so I haven’t been able to do it yet.
Other than that, so far so good.
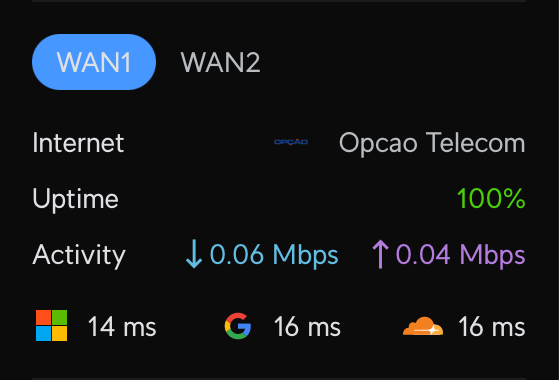
WAN1.
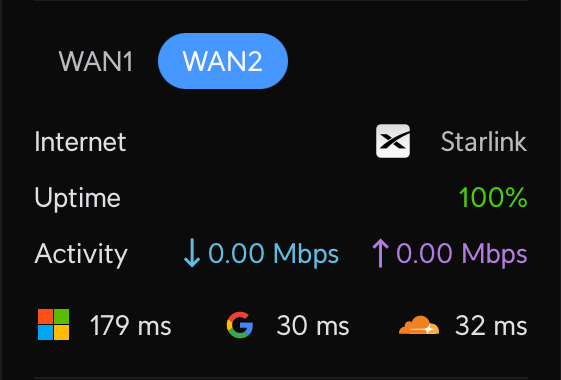
WAN2.
My goal was to have a secondary link operating as a fallback, integrated with my existing infrastructure, and I now have it.
As of now, if the power goes down, so does the Starlink router/antenna. I’m gonna get another UPS just for it and put it up in the attic. Just need to find one that doesn’t beep when the power is out.
Unrelated, but I also noticed some of my cameras are also getting FE speeds only, I’ll redo their terminations at some point, too.
Small Form-factor Pluggable. You can get RJ45 and Fiber modules, among others. These ports support 10 Gbps. ↩︎
Optical Network Unit, basically a modem. ↩︎
Rumors around the town say that they get the batteries from their no-breaks stolen all the time… so they simply gave up until they get some sort of traceable batteries I never heard about. 🤷 ↩︎
Fast Ethernet (10/100). ↩︎
Gigabit Ethernet (10/100/1000). ↩︎