Announcing GoReleaser v2.1
Winter is here (in the South America)! Let’s see whats new! Highlights new: before …

Most people run GoReleaser by creating a tag locally, pushing it, and letting their CI takes care of the matter.
Another lesser known option is to leverage workflow_dispatch on a GitHub
Action to create the tag locally, and then “auto-creating” the tag once the
release finishes.
This has a couple of trade-offs, though:
In the other hand, there are also some advantages to this approach:
With all that said, let’s see how it works!
This is not strictly required, but it helps making sure the correct commit is tagged.
# .goreleaser.yml
# ...
release:
  target_commitish: '{{ .Commit }}'
# ...
And that’s pretty much everything we need to change here.
Next step is the release workflow.
Usually, you would want it to run on new tag push events, for instance,
something like this:
# .github/workflows/release.yml
name: goreleaser-release

on:
  push:
    tags:
      - '*'
# ...
You will want to remove that, and use workflow_dispatch instead.
We will also need to ask what is the new tag we the workflow should create.
Finally, we need to create that tag somewhere.
So, your workflow should look somewhat like this:
# .github/workflows/release.yml
name: release

on:
  workflow_dispatch:
    inputs:
      tag:
        description: 'New tag name'
        required: true

# ...

jobs:
  goreleaser:
    runs-on: ubuntu-latest
    steps:
      - uses: actions/checkout@v3
        with:
          fetch-depth: 0
      - run: git tag ${{ github.event.inputs.tag }}
      # other steps bellow as usual

# ...
This way, when I want a new tag, I go the “Actions” tab on my repository, find the release workflow, and run it, passing the new tag I want to create.
And as you can see, it works:
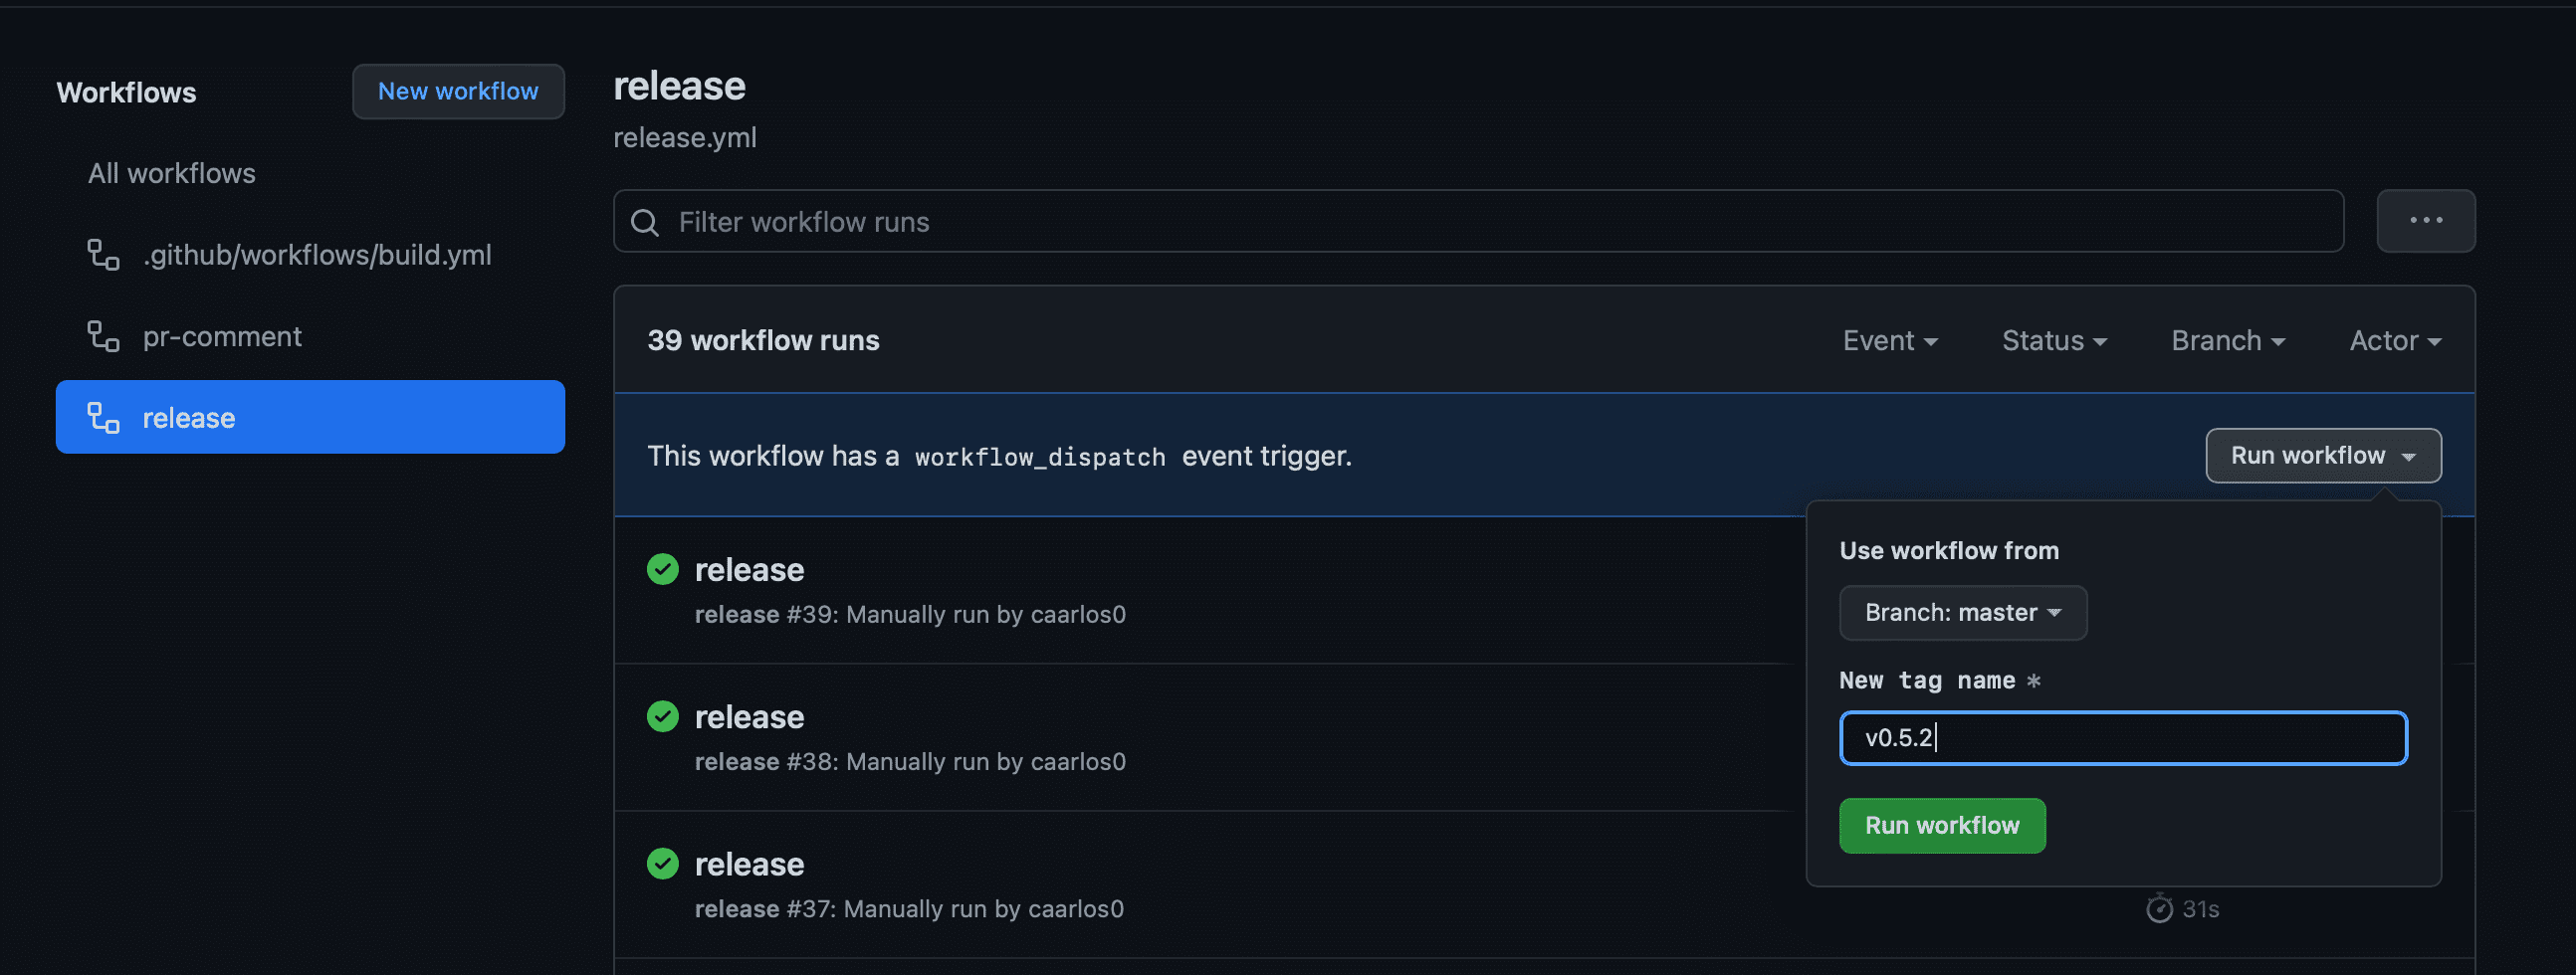
GitHub actions Run workflow
Avid readers of this blog might have noticed that this is very similar to the strategy provided at one of my previous posts, “Enabling Nightly releases using GoReleaser Pro”, and you would be right.
The idea is very similar, but nightlies make the trade-offs a little bit more visible and are available only for GoReleaser Pro.
Well, that’s what I had to show you today! I hope it’s helpful somehow, and I’ll see you in the next one!